Ghost Mannequin Photography: The Complete Guide (Studio, Photoshop, and AI)
Learn how to create the ghost mannequin effect for your product photos, from the full studio process with a mannequin and Photoshop to the AI way that turns one phone photo into a finished packshot.

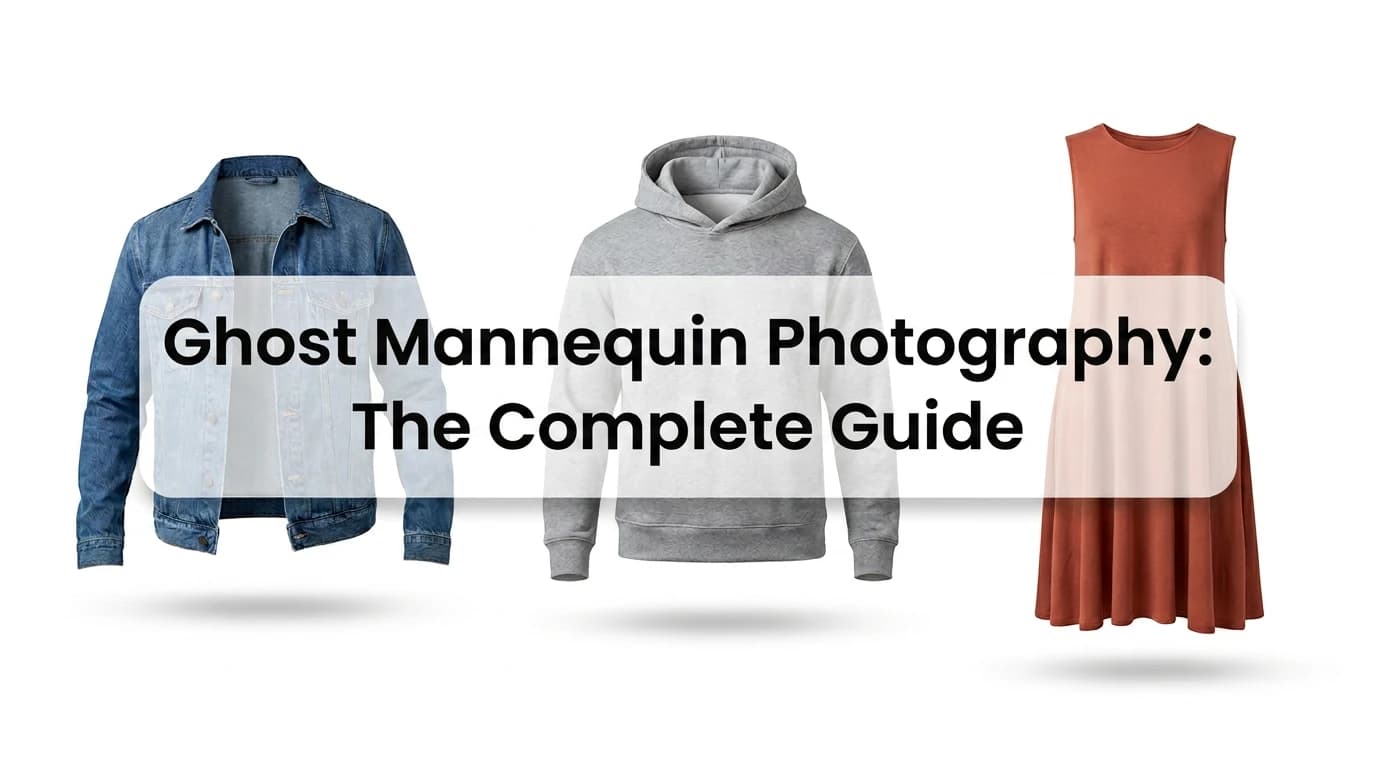
Scroll through any major clothing store online and you’ll see the same style of product photo over and over: a garment that looks worn by an invisible body, floating on a clean white background. That’s the ghost mannequin effect, also known as the invisible mannequin or hollow man effect.
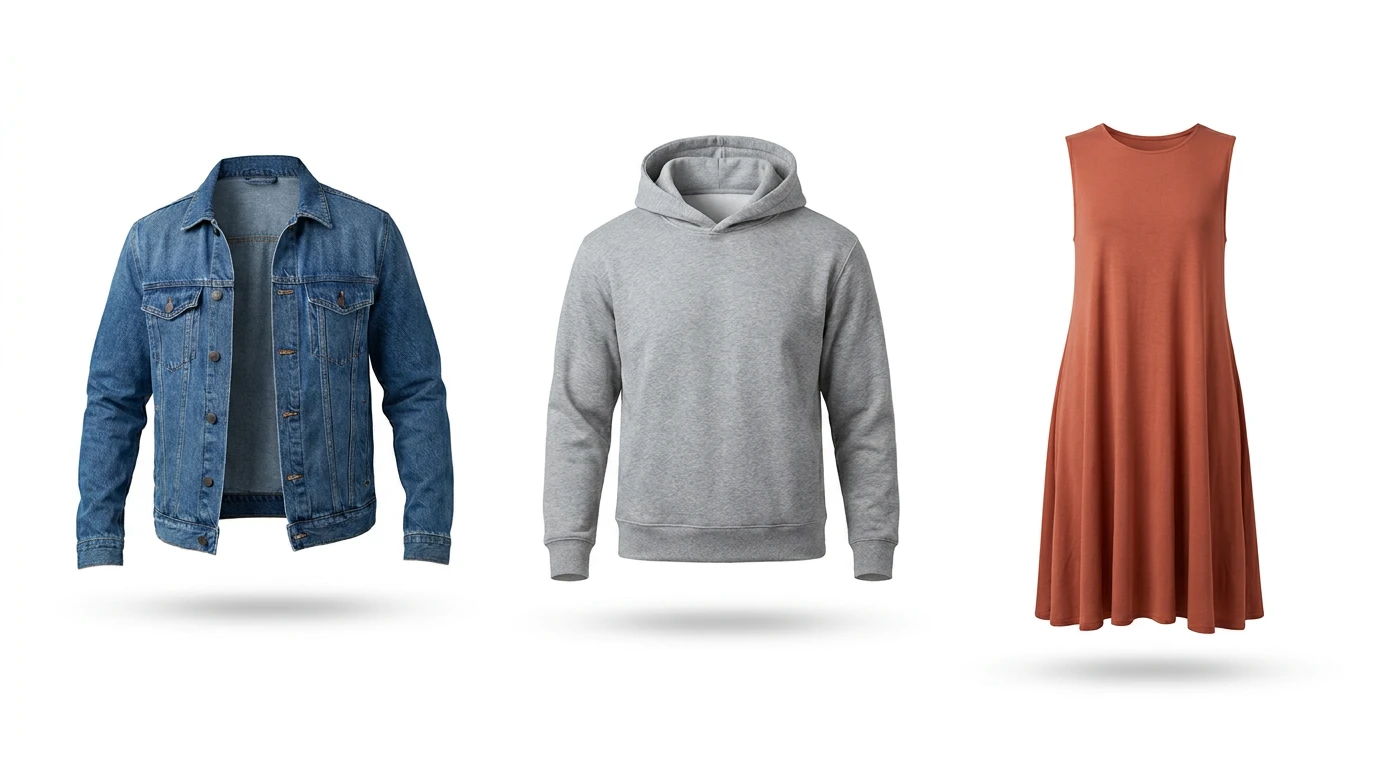
The ghost mannequin look across garment types: structure, a hollow neck opening, and natural drape, with no visible form holding anything up.
It became the standard for a reason: it shows the true shape and drape of a garment without a model to distract from it, and it makes an entire catalog look consistent, photo after photo.
There are two ways to get this look. The traditional way involves a mannequin, a lighting setup, several shots per garment, and a Photoshop compositing session. The new way uses AI to generate the effect from a single photo, even one taken on your phone.
This guide covers both in detail, so you can pick the method that fits your catalog, your budget, and your deadline.
What Ghost Mannequin Photography Is (and Why Stores Use It)
A ghost mannequin photo is a product shot where the garment keeps its worn, three-dimensional shape, but the person or mannequin wearing it has been removed. The giveaway detail is the neck area: a good ghost mannequin image shows the inside back of the collar, including the brand label, as if you’re looking into the garment.
Retouchers call that reconstructed collar area the neck joint, and it’s what separates a professional result from an obvious cutout.
Stores standardized on this style because it solves several problems at once:
- Shoppers see the actual fit and drape, not a flat, lifeless garment
- Product grids look uniform, which builds trust on category pages
- There’s no model to date the photo or pull attention from the product
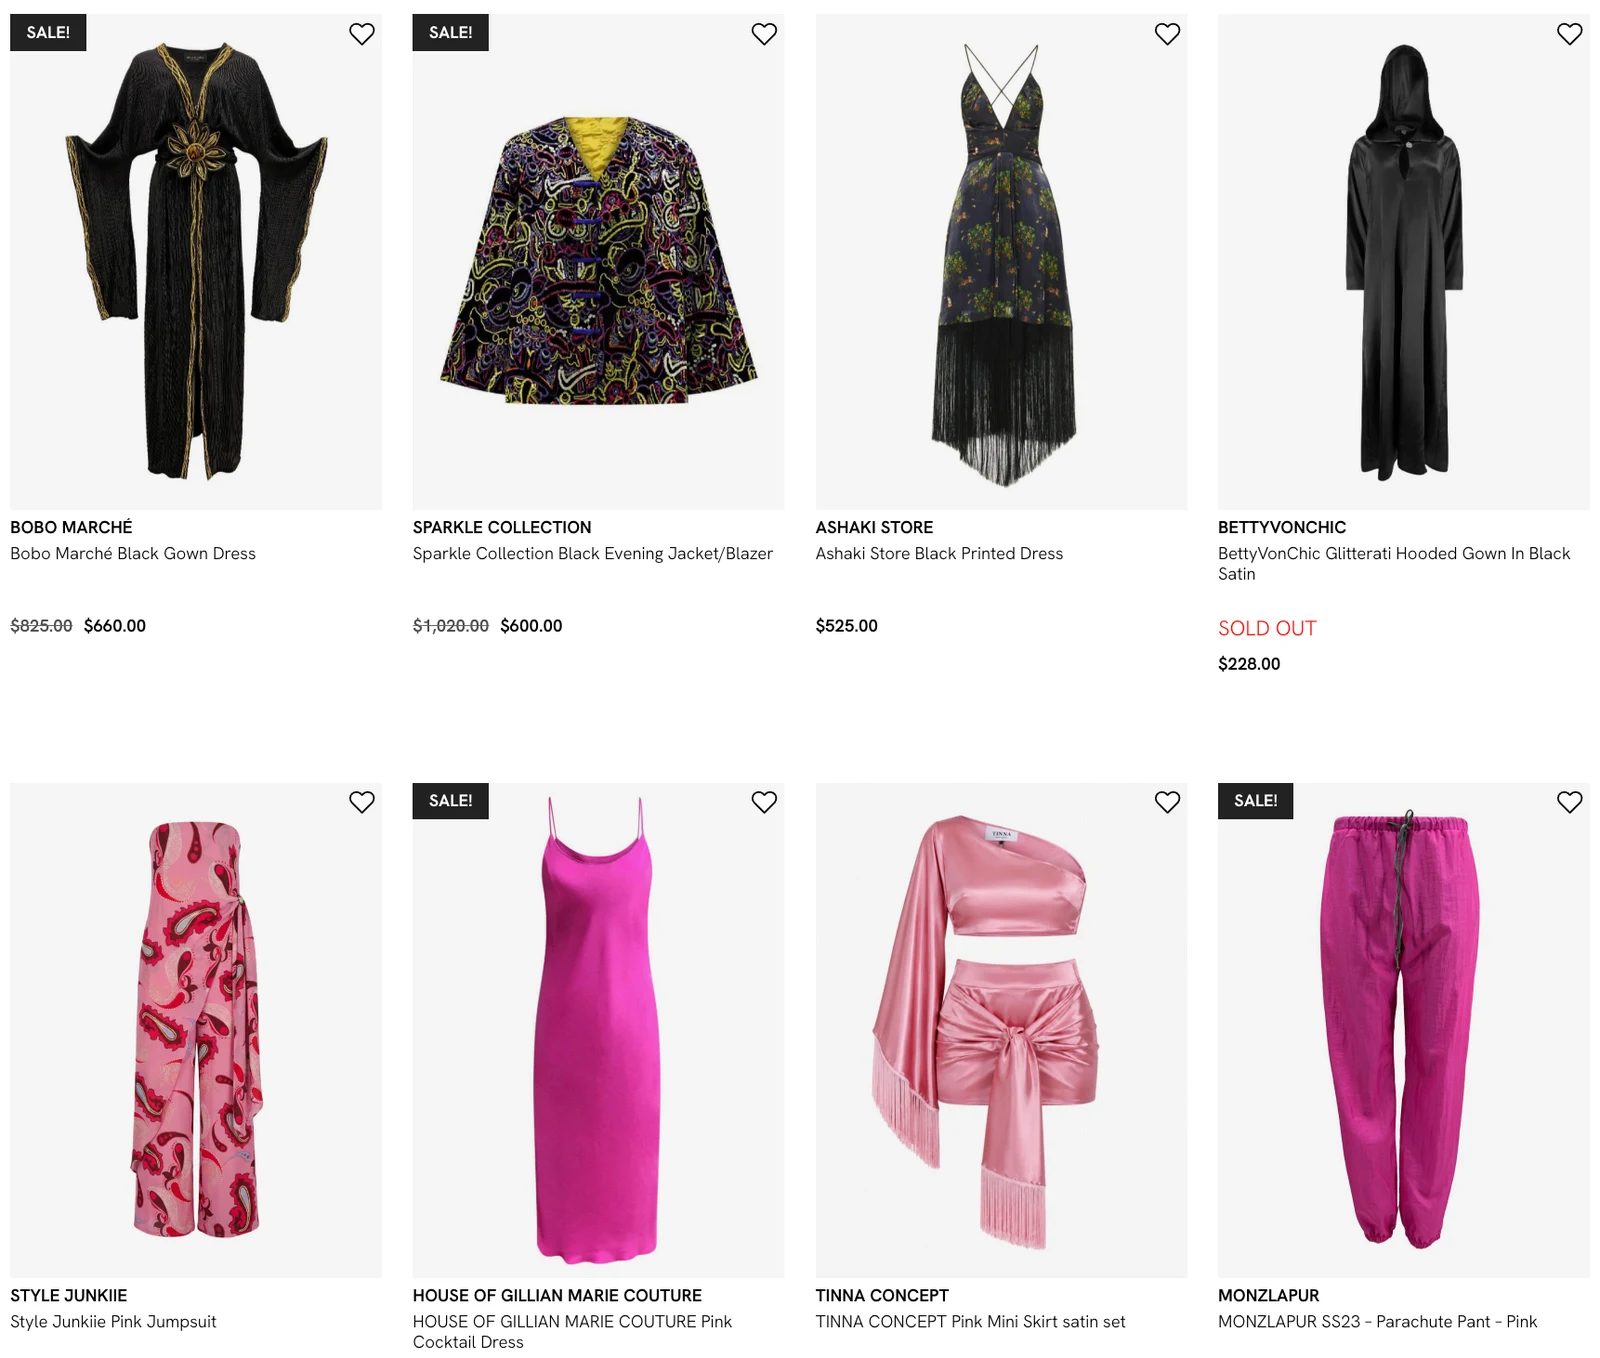
The consistent-grid effect in the wild: dozens of designers, one uniform ghost mannequin style, on the clothing pages at flyingsolo.nyc.
One nuance most guides get wrong: Amazon’s apparel style guide doesn’t allow visible mannequins in product images at all, and its fashion imaging guidelines want adult clothing main images on a model or laid flat. The ghost mannequin look is the standard for the product-only views: the additional images in a marketplace listing, and the catalog pages of your own store, where it’s often the hero style.
Check the size requirements too. Amazon asks for at least 1,500 pixels on the longest side so shoppers can zoom in, and many brands standardize on 2,000 pixels or more.
The Equipment You Need
If you’re going the traditional route, here’s the core kit:
- A ghost mannequin. Unlike a display mannequin, it’s matte white and has removable panels (neck, chest, arms) so the mannequin can hide inside the garment. Torso versions start around $300 and full-body systems can pass $1,000; browse the ghost collections at Mannequin Mall or Mannequin Madness to see the range. A standard mannequin works too, but you’ll spend longer in Photoshop.
- A camera and a tripod. Any recent camera body is enough; the lens is what matters. Use a 50 to 85mm prime and avoid wide angles, which distort the garment. Canon shooters can add the RF 50mm f/1.8 for around $220, and every other brand makes an equivalent budget prime. The tripod is just as important as the camera, since the whole compositing process depends on identical framing between shots; something sturdy like the Manfrotto 055 (plus a head) will last for many years.
- Two lights. Softboxes at 45 degrees on both sides, five or six feet from the mannequin, give even, near shadow-free coverage. A two-light LED softbox kit like Godox’s SL100D kit covers this in one box for under $500. White foam boards help bounce light into recessed spots like underarms.
- A white seamless background. Paper rolls run $30 to $50 and are replaceable; Savage’s Super White Widetone is the industry standard.
- Prep tools. A garment steamer (Jiffy’s J-2000 is the studio workhorse, and their handheld ESTEAM is fine for occasional use), pins, clips, tissue paper, and double-sided tape.
All in, a capable home setup lands somewhere between $800 and $2,000 before the camera.
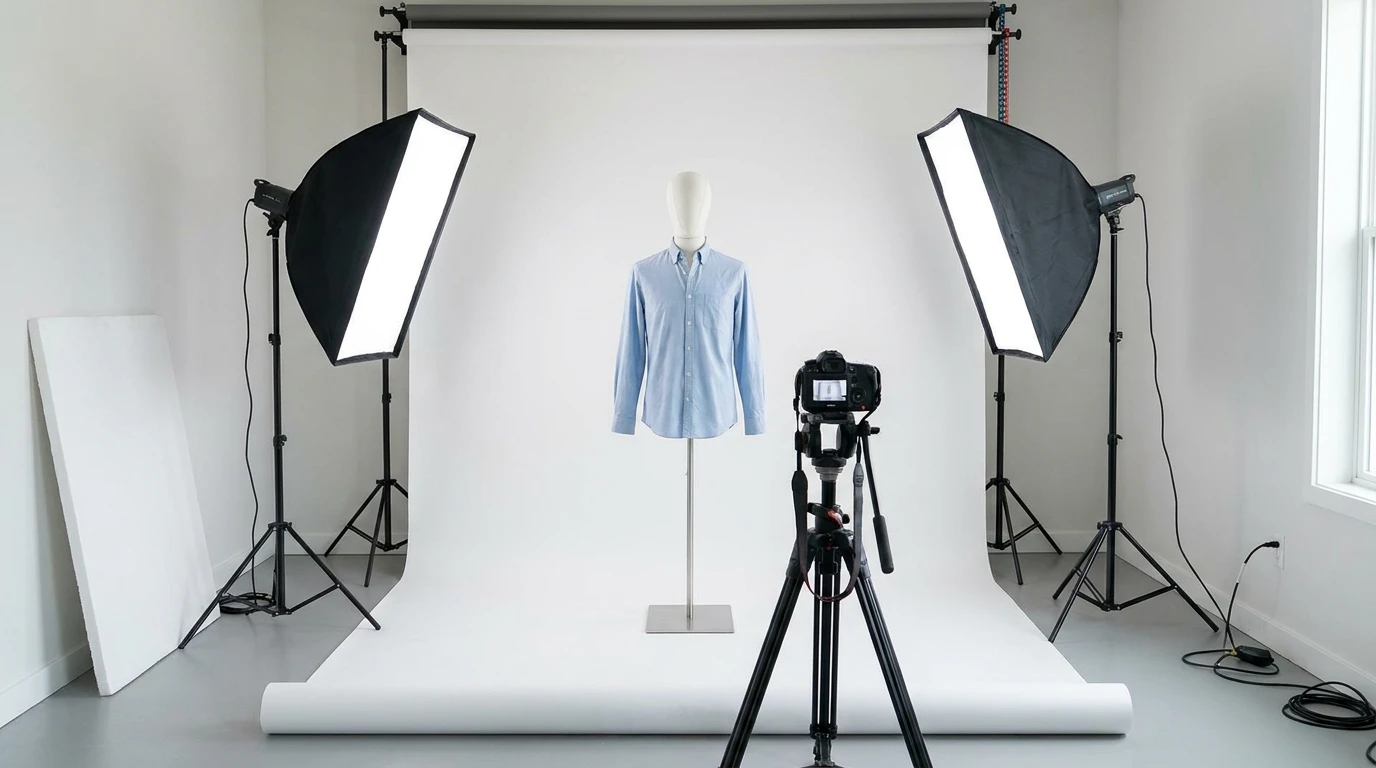
The whole setup in one frame: mannequin on seamless paper, two softboxes at 45 degrees, foam board within reach, and a locked-down camera.
Prep the Garment Before You Shoot
Every wrinkle you steam out now is retouching time you save later. Steam or iron the garment thoroughly, lint-roll it, and check for loose threads before it goes anywhere near the mannequin.
Fitting is where most beginners lose the “worn” look. Garments almost never match the mannequin’s size exactly, so you make up the difference from behind:
- Pin excess fabric vertically along the back, on the side the camera can’t see. Vertical folds stay invisible from the front, while pulling sideways stretches wrinkles across the chest that will show in the photo.
- Fill the sleeves and hem lightly with tissue paper so they hold a natural, rounded shape. Aim for a little natural volume, not a stuffed look.
- Use double-sided tape to keep cuffs, collars, and hems sitting flat.
- Straighten the seams, center the placket, and get the shoulders as close to mirror images as you can.
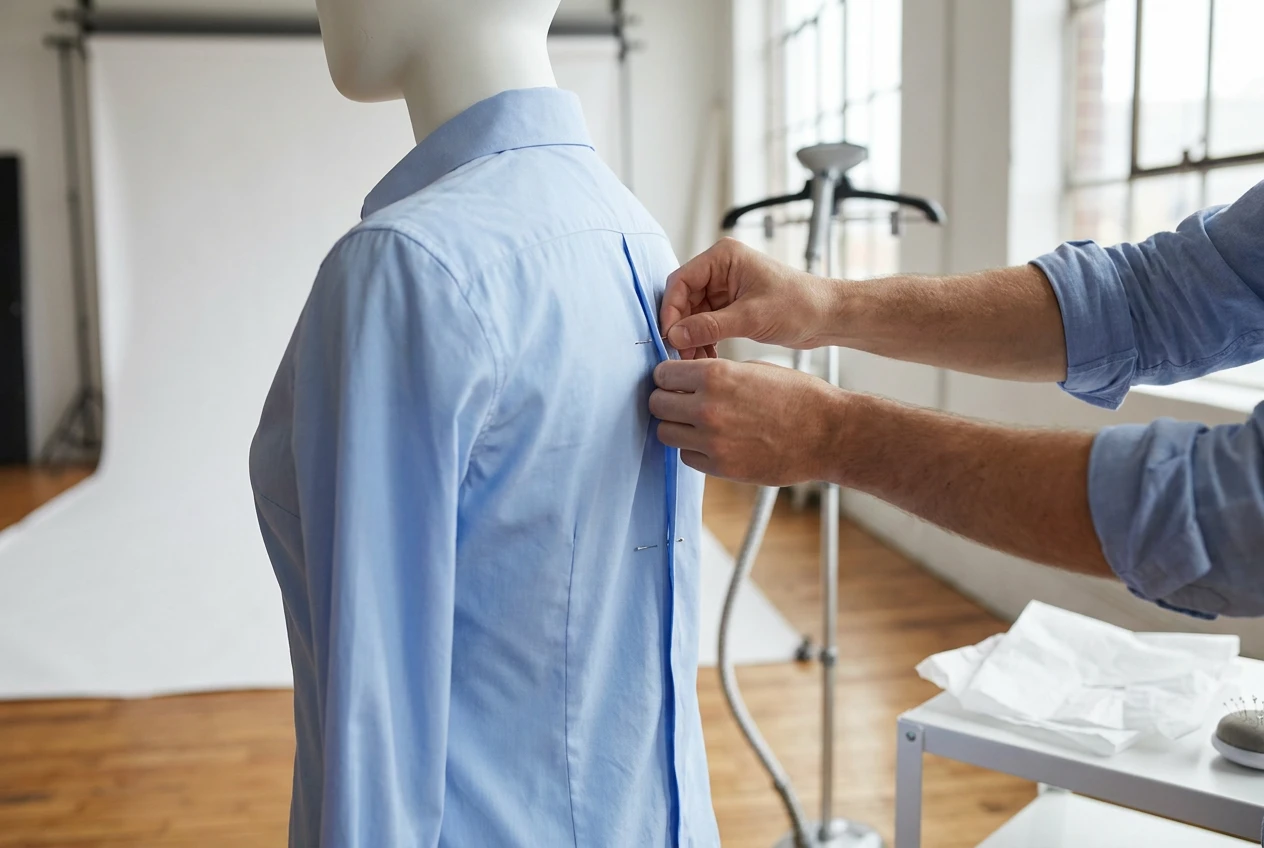
Fit the garment from behind: excess fabric pinned into a vertical fold the camera never sees.
The Shoot, Step by Step
Step 1: Lock your camera and lighting
Put the camera at the garment’s chest height for tops, or hip height for bottoms. Shooting from the wrong height tapers the garment and misrepresents the fit. Mark the mannequin’s position on the floor with tape, set everything manual (around f/8 to f/11, ISO 100 to 200, fixed white balance), and then don’t touch any of it for the rest of the session. Catalog consistency comes from this discipline, not from editing.
Step 2: Shoot the main product shots
Photograph the garment straight-on from the front, then rotate the mannequin (not the camera) for the back shot.
Step 3: Shoot the inside shot
This is the shot most beginners skip, and the whole effect depends on it. You need a photo of the garment’s inner back collar, including the brand label, because that’s what fills the neck hole once the mannequin is gone.
Two ways to get it: lay the garment on a white foam board (folding the front neckline down) and shoot it in the same spot the mannequin stood, or, if your ghost mannequin has a removable chest panel, pop it out and shoot the collar interior in place. Either way, keep the same lighting and white balance as the main shots, or the composite will never blend.
Step 4: Grab detail shots while you’re set up
Cuffs, hems, prints, hardware, and for hoodies, the hood interior. You won’t composite all of them, but they’re cheap to capture now and expensive to re-shoot later.
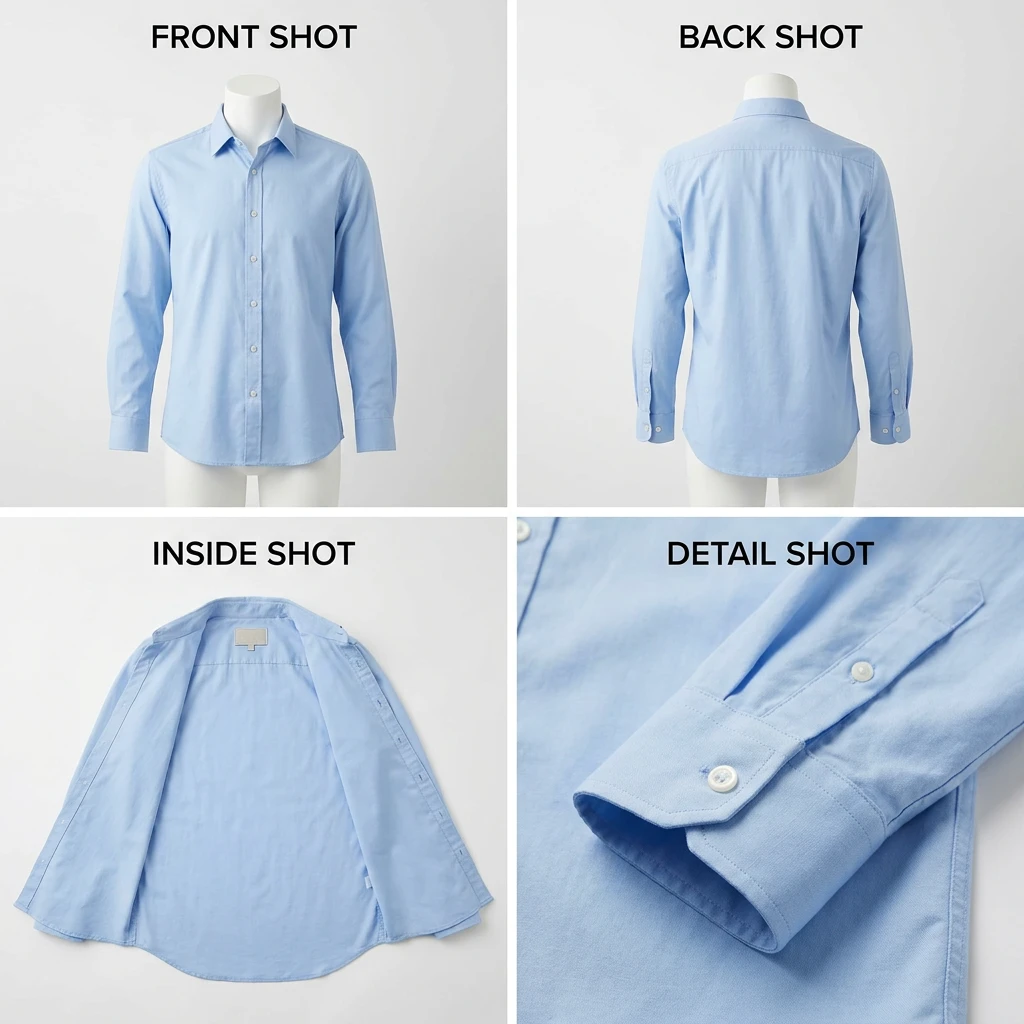
The full shot list from one fixed camera position: front, back, the inside shot, and details.
The Photoshop Part: Compositing the Ghost Effect
Here’s where the shots come together, following the same workflow retouching studios use.
Remove the mannequin
Open the front shot, trace the garment with the Pen tool (or start with Select Subject and refine), feather the edge slightly, and mask the mannequin out. Zoom to 100 percent and inspect the neck, shoulders, and armholes, because sloppy edges in these areas are the first thing that makes a ghost mannequin image look amateur. If layer masks are new to you, Adobe’s masking guide covers the mechanics.
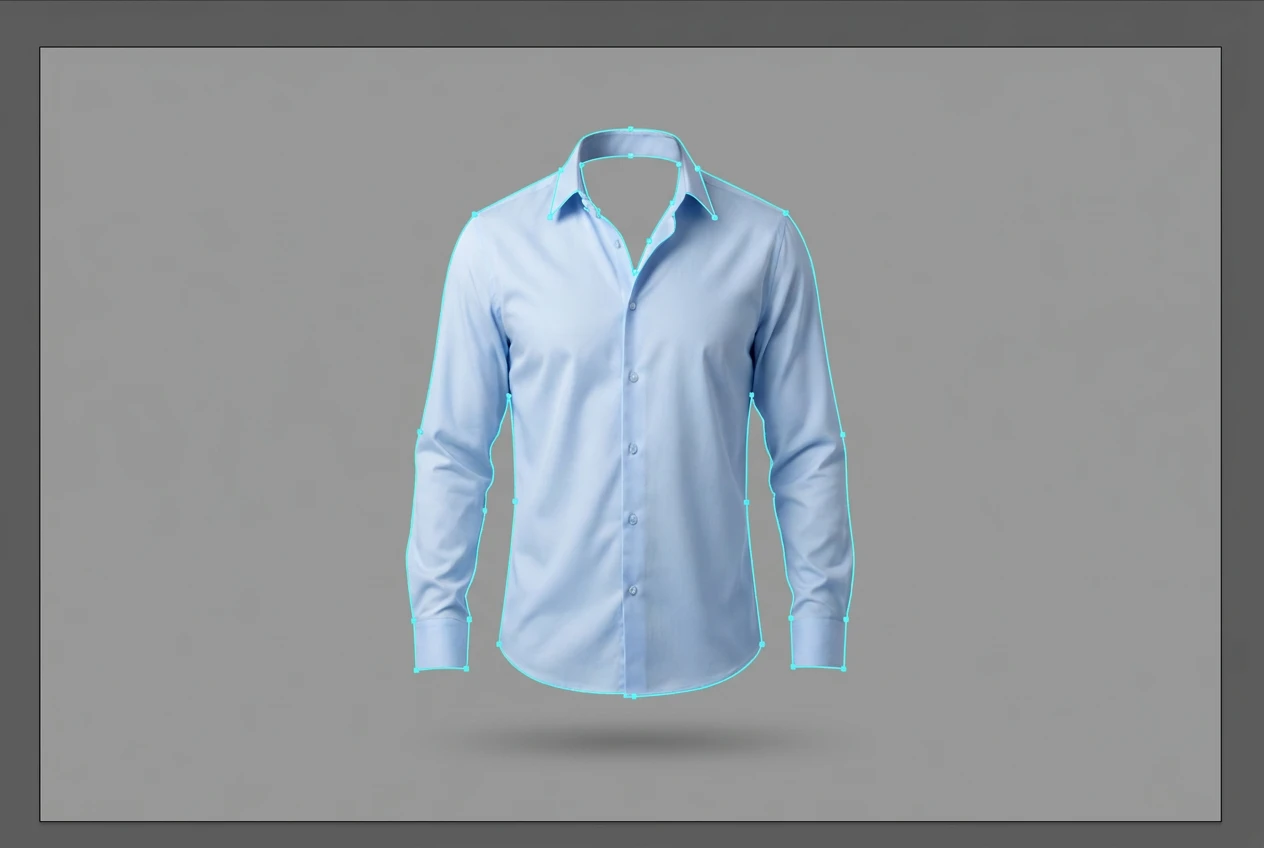
The mannequin masked away: a clean path around the garment leaves a hollow shirt and an empty neck hole to fill.
Build the neck joint
Place the inside shot on a layer behind the garment. Drop its opacity to around 50 percent so you can align it inside the neckline, then warp it to match the collar’s curve and mask it to shape.
Add the shadow most tutorials skip
Paint a soft shadow between the garment layer and the interior layer (a Multiply layer at 10 to 20 percent opacity works well). This one step is what makes the neck opening look like a real 3D cavity. Skip it and you get the classic amateur tell: the flat neck hole, where the collar looks like a sticker instead of an opening.
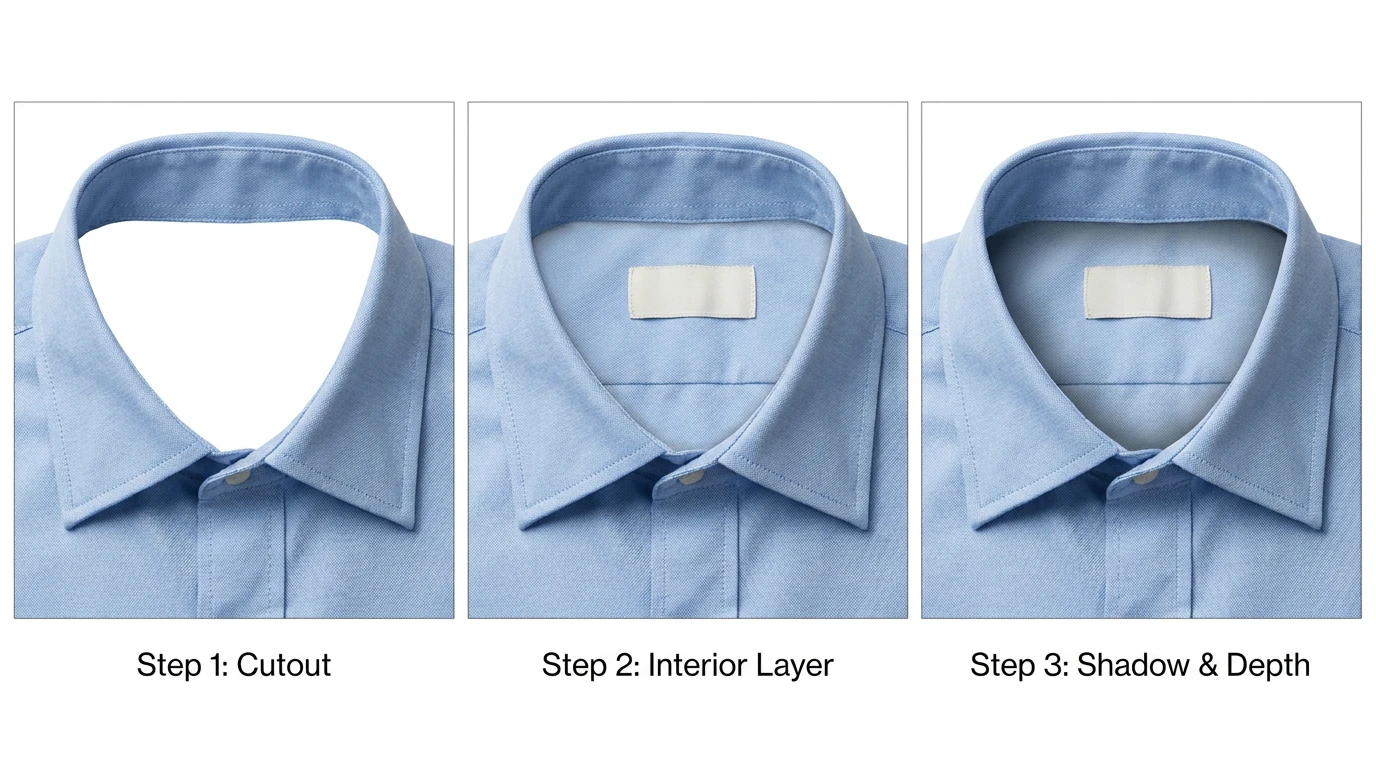
The neck joint in three states: the hole the mannequin leaves, the interior dropped in flat, and the shadow that turns it into a real opening.
Restore the label
The inside shot helps a second time here: the brand label appears together with the neck joint. It’s worth getting right, because the label is often the only branding visible in the final image, and shoppers notice a suspiciously blank collar.
Final cleanup
Use the healing brush to remove lint, threads, and pin dents, flip the canvas horizontally to spot asymmetry, match the interior’s exposure to the exterior, and crop to your standard ratio. Resist the urge to over-smooth: if you erase the fabric’s texture, the garment starts to look artificial.
Expect this to take real time. Experienced retouchers spend roughly 10 to 30 minutes per image, up to an hour for structured outerwear, and beginners should expect two to three times that.
Want to watch the whole process end to end before trying it? This walkthrough covers both the shoot and the edit:
What This Costs in Time and Money
Before you commit, add up the full bill:
- Gear: roughly $800 to $2,000 for lights, backdrop, and prep tools, plus $200 to $600 for the mannequin, before the camera
- Your time: prep, four or more shots, and an editing session per garment, with preparation usually taking longer than the shooting itself
- Outsourcing the editing: retouching services like Path start under $1 per image for a single neck join, while multi-joint reconstructions (necklines plus sleeves plus hems) run $2 to $12 per image
- Full-service studios: shops like Squareshot charge roughly $40 to $75 per image with shooting and retouching included, and usually deliver in about a week
For a handful of hero products, that investment can make sense. Multiply it across hundreds of SKUs per season, though, and you can see why product photography becomes one of the biggest line items in an e-commerce budget. We broke down the full math in the true cost of fashion photoshoots.
The AI Way: One Phone Photo Instead of a Studio
Packshot is FASHN’s tool for exactly this job. You upload one photo of your product, and it generates a finished packshot: by default, the ghost mannequin look on a clean white background, with the garment’s structure, prints, and proportions preserved.
You can export at 1K (1MP), 2K (4MP), or 4K (16MP). For marketplace listings, choose 2K or larger to stay above the size requirements covered earlier.
The mannequin, the shot list, and the compositing session all disappear. The photo you already have is the input.
Start from a flat-lay (recommended)
The capture we recommend is the simplest one: lay the garment flat, smooth it out, and take a photo from above with your phone. Make sure the inner neck label is visible.
Packshot adds the three-dimensional structure for you: filled sleeves, a shaped body, clean neck and hem openings. And because the label was visible in your source photo, it survives into the final image, which means the one detail that normally requires a dedicated inside shot and a compositing session comes for free.
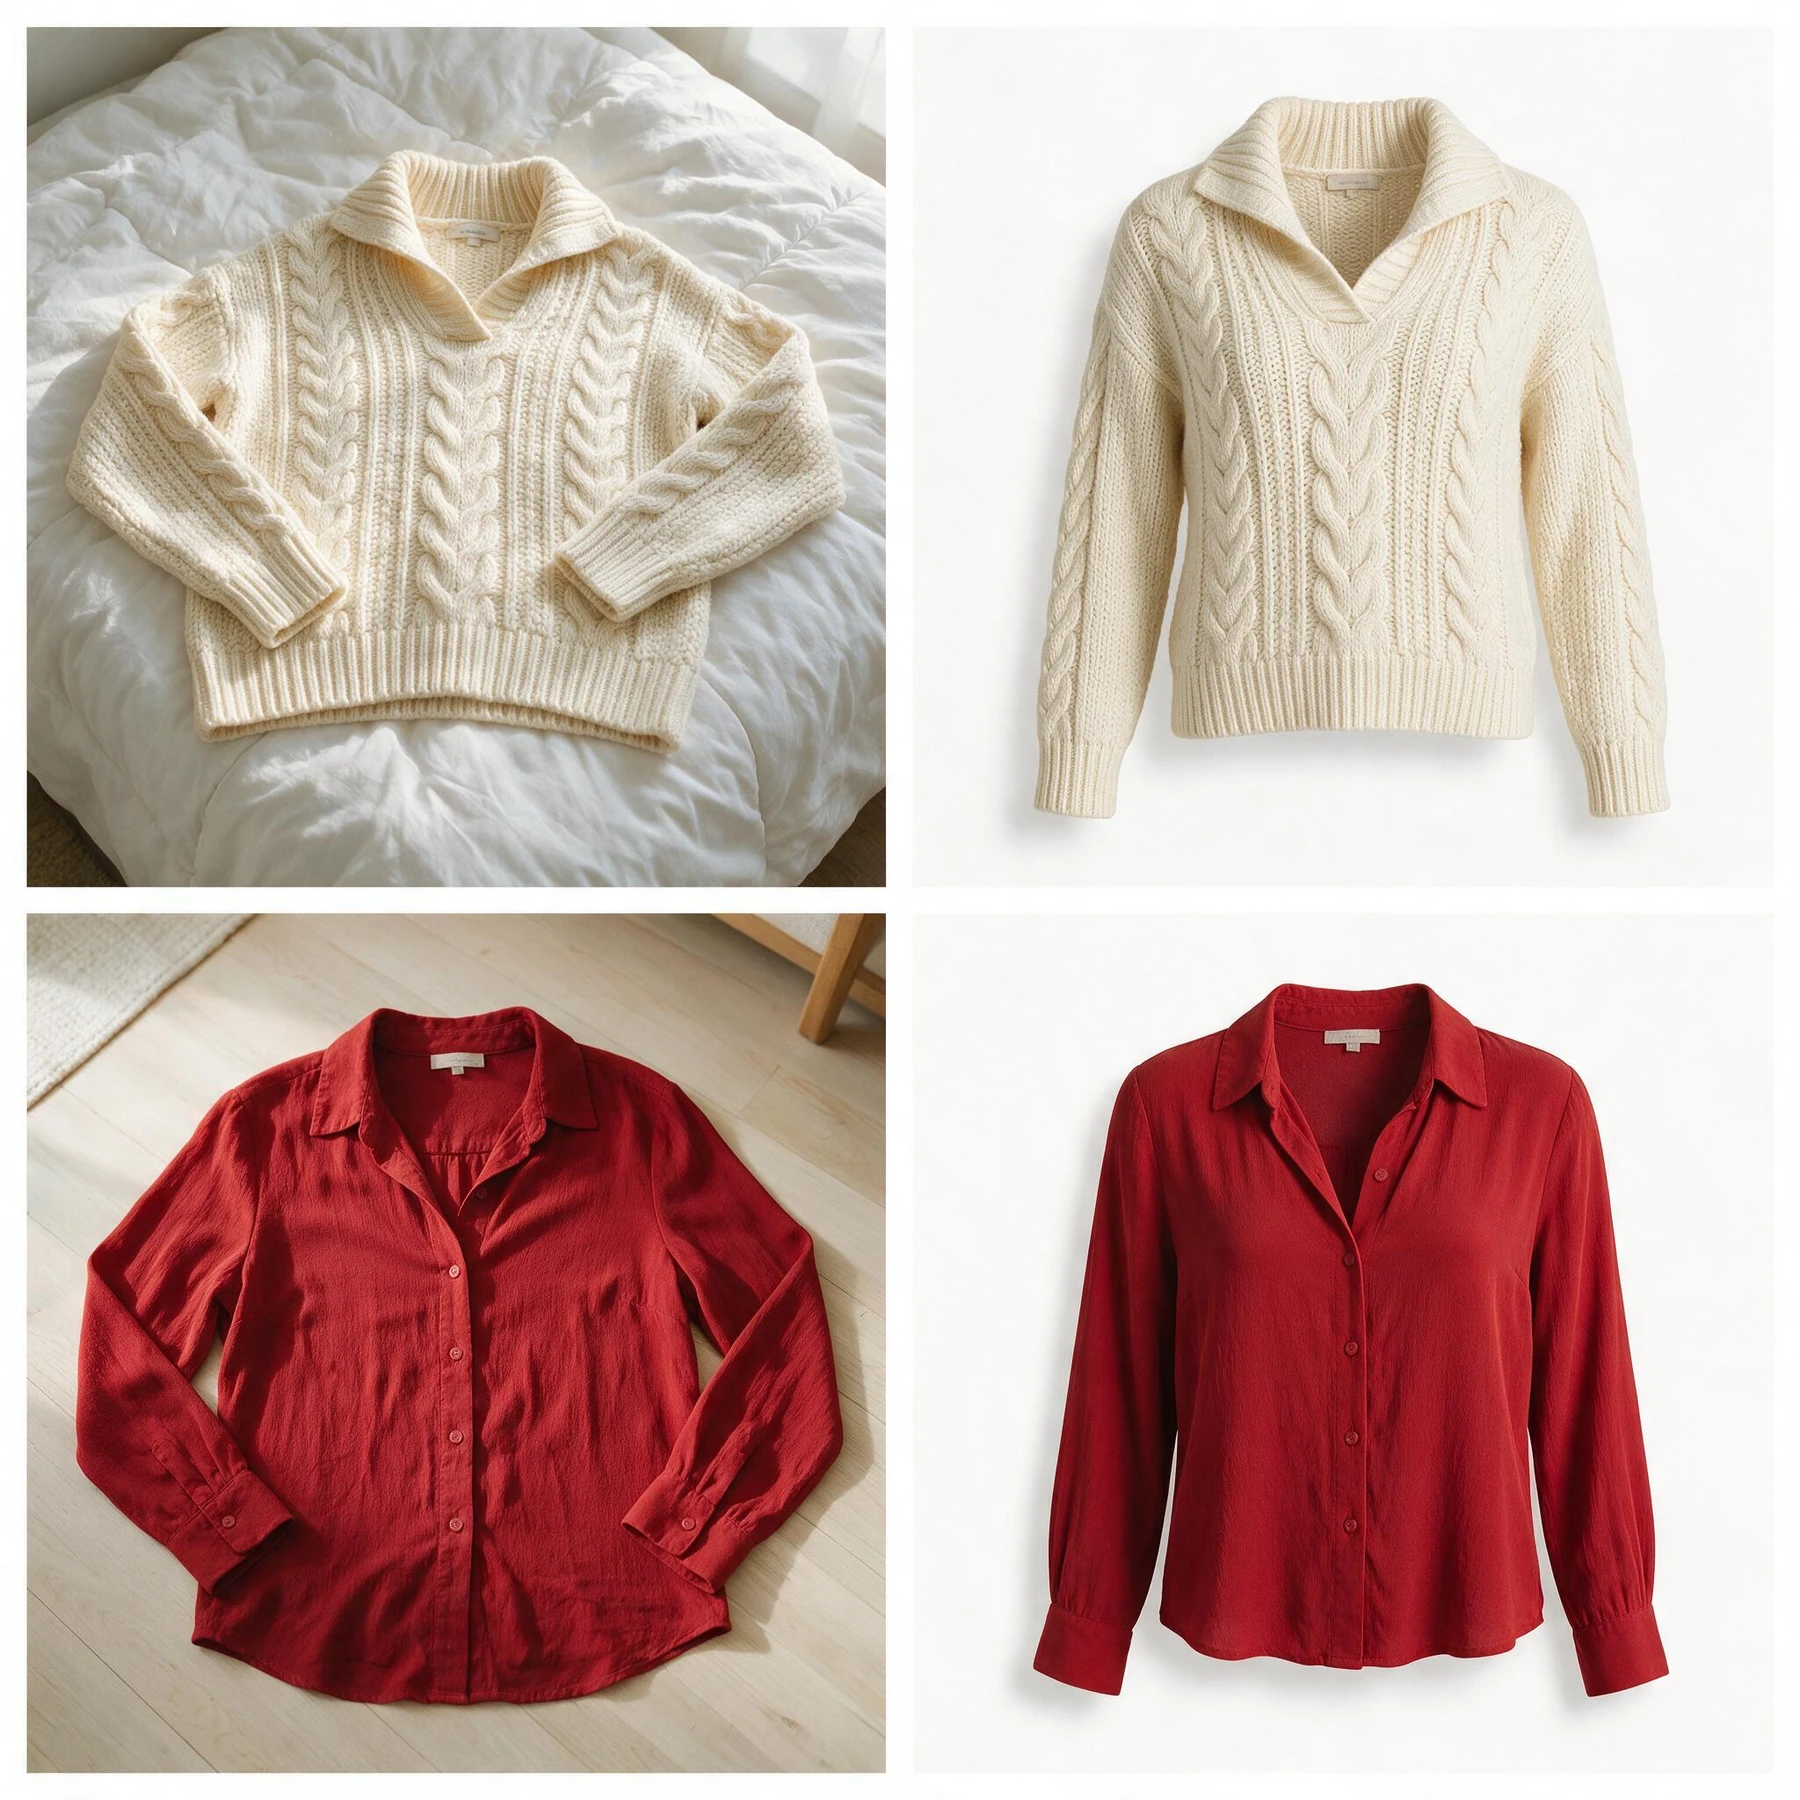
Two products, one workflow: your photo at home on the left, the finished ghost mannequin packshot on the right. Colors, stitches, and labels stay exactly the same.
Or wear it and let the AI remove you
If the garment is hard to lay flat, put it on. Photograph yourself (or anyone) wearing it, front-facing, with the garment fully visible. Packshot removes the person and renders the garment as a standalone product shot with its worn shape intact.
One catch: in a worn photo, the inner neck label isn’t visible, so it can’t appear in the output. If your listing standard requires the label, you’ll still need a quick Photoshop step to add it, or just use the flat-lay path instead.
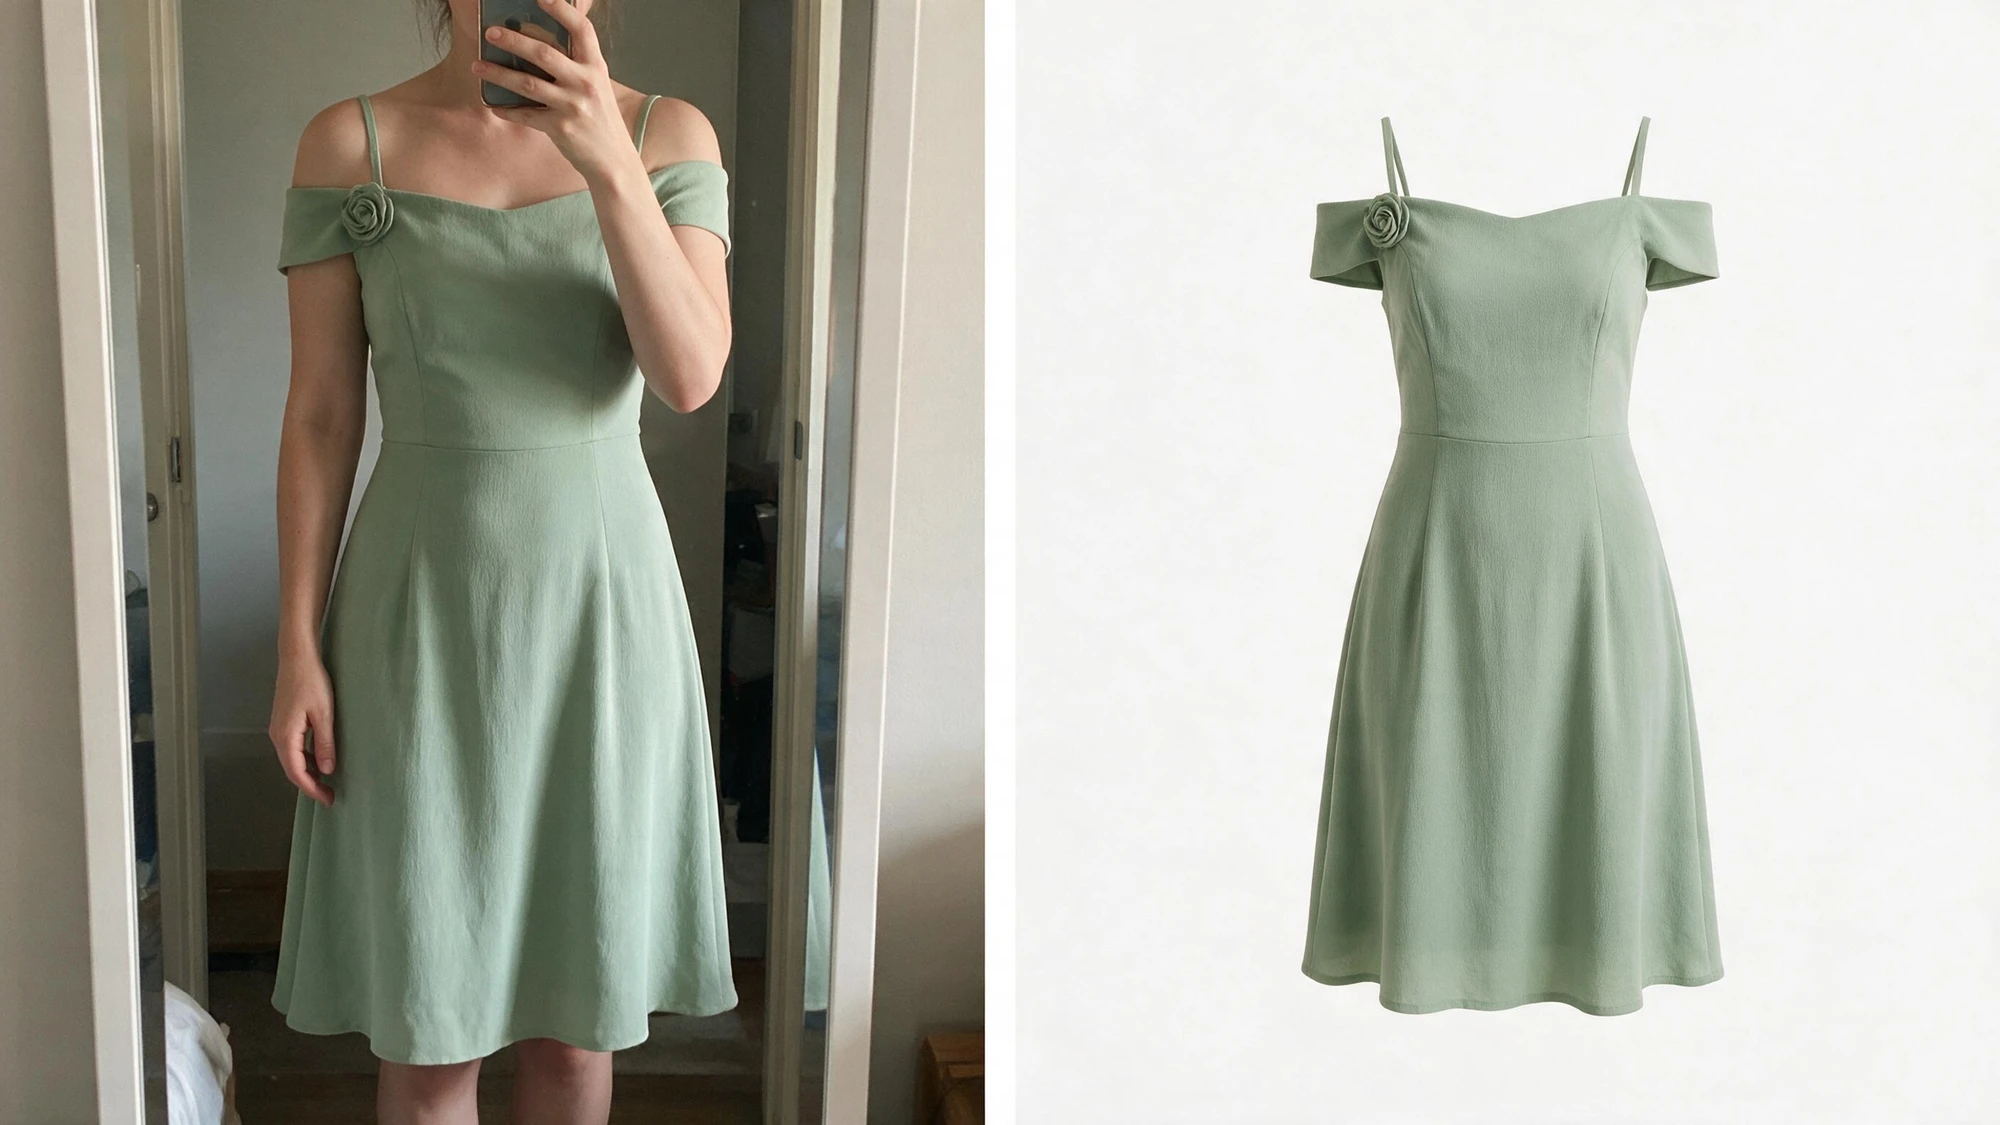
One mirror selfie in, one packshot out: the person is removed and the dress keeps its worn shape, down to the rosette on the strap.
When a mannequin is still the better source
For complicated construction (structured blazers, stiff outerwear, anything where precise drape matters), a real mannequin or a person shows the garment’s shape better than a flat-lay can. That’s fine: Packshot accepts mannequin and on-model photos as sources too, so photos from studio work you’ve already done fit into the same workflow.
Beyond ghost mannequin
Ghost mannequin is the default, but the same tool produces flat-lay, on-hanger, and floating presentations. You control the style with a short prompt or a reference image, and paid plans include a library of curated FASHN Packshot References, so a whole catalog can share one consistent style. The help center guide covers every option.
Run it wherever you are
- In the Studio: open Packshot in the FASHN app, upload, generate.
- In chat: ask the Agent in the app to turn your photo into a packshot.
- On your phone: the FASHN iOS app runs the same Agent, so you can shoot the flat-lay and have the finished packshot before you’ve put the garment back on the shelf.
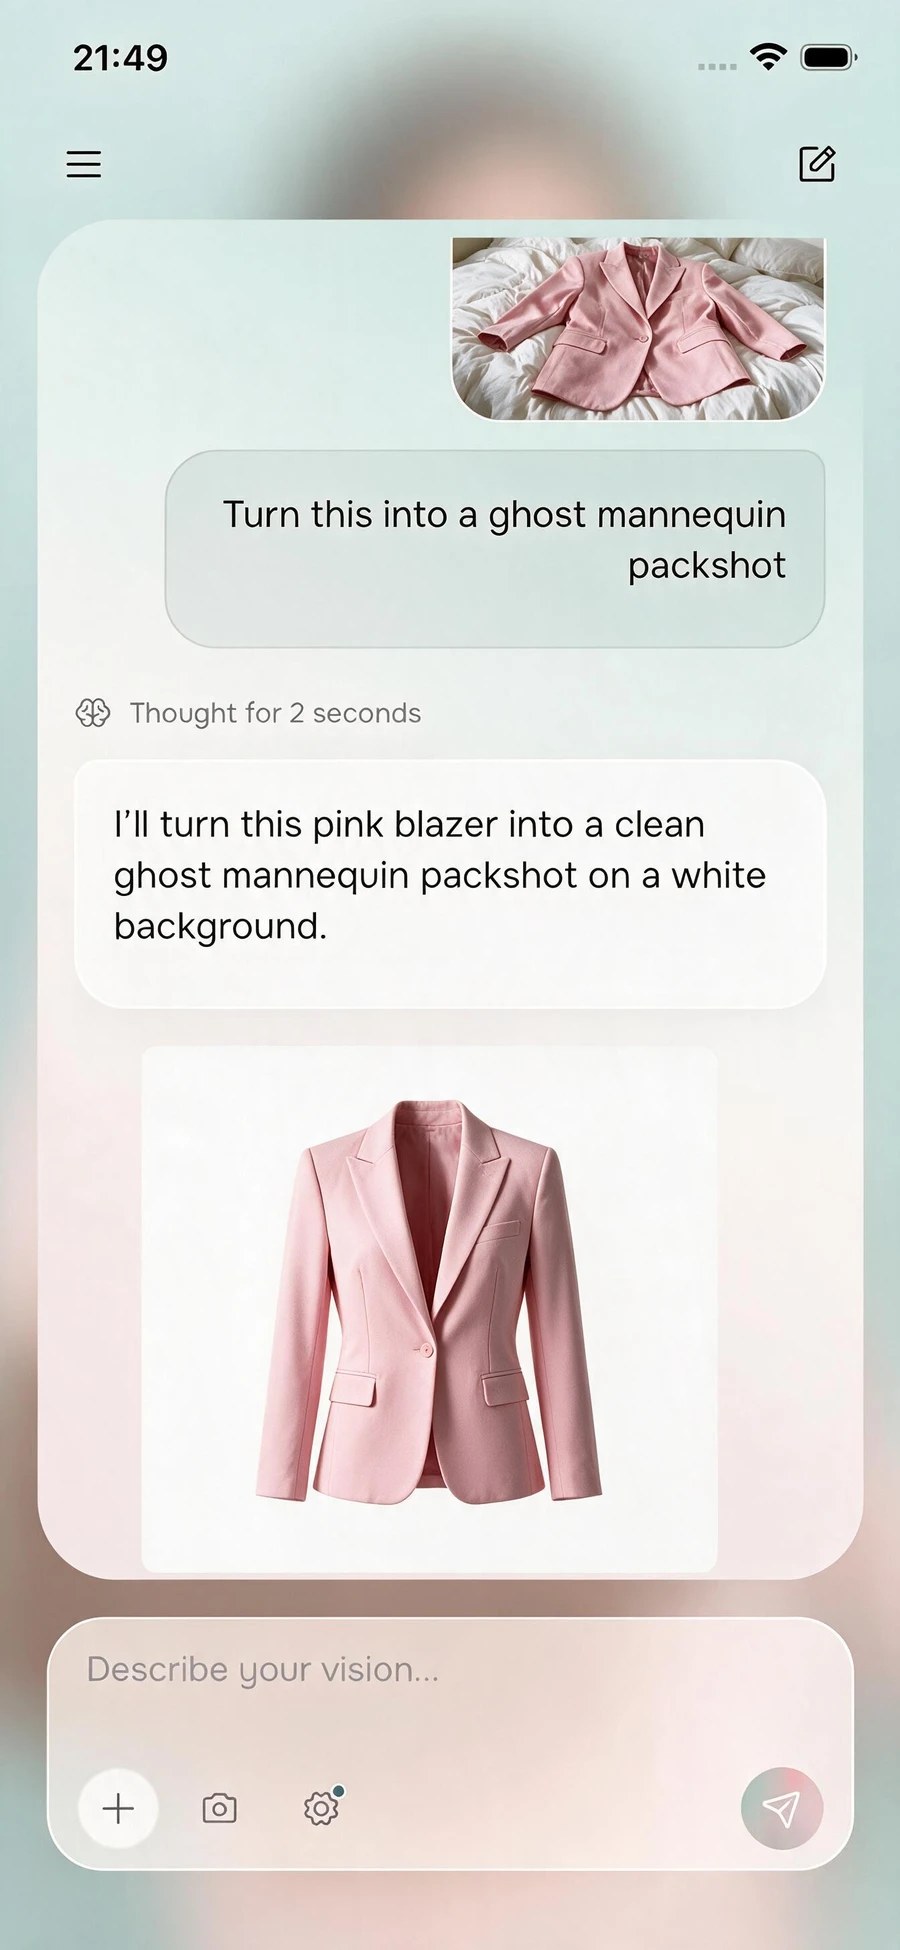
The whole workflow on a phone: photo, one sentence to the Agent, finished packshot.
Which Method Should You Use?
It comes down to three things: how many garments you have, what each shot is worth, and what you can photograph.
| Your situation | What I’d do |
|---|---|
| A handful of hero pieces for a lookbook or campaign | Shoot them traditionally. Hand styling and a careful retouch are worth the cost here. |
| A large catalog on a deadline | AI from flat-lays. One phone photo per garment. |
| Just you, a phone, and a pile of products | AI. Lay each piece flat and keep the label in the frame. |
| Structured pieces like blazers and coats | Style them on a real mannequin first, then run those photos through the AI. |
| Old mannequin or studio photos on a hard drive | Reuse them. They work as AI source photos as they are. |
Traditional wins when a single image really matters, because nothing gives you more control than styling the actual garment by hand. It’s slow and it costs money, and for a hero shot that can be worth it.
AI wins on volume, and it wins when a studio was never realistic in the first place. Its limits are the ones covered earlier: it can’t show a label that isn’t in your source photo, and a heavily structured garment usually needs a mannequin’s help before you photograph it.
Most brands end up doing both. Shoot the pieces that deserve it, let the AI handle the rest, and recycle any mannequin photos you already have.
The Ghost Mannequin Look, With or Without the Studio
The traditional method still produces beautiful results, and now you know the full workflow: the gear, the inside shot, and the neck joint compositing (plus the shadow) that makes the effect believable.
But if what you’re actually after is a catalog of clean, consistent, PDP-ready product photos, you no longer need a studio to get there. One flat-lay photo per garment is enough.
Try it in FASHN and turn the photos you already have into finished packshots.