How to Photograph Clothes for AI: I Shot One Jacket 12 Ways
I photographed one jacket 12 different ways and ran every set through the FASHN Agent. Here is what worked: views, fit, light and details.

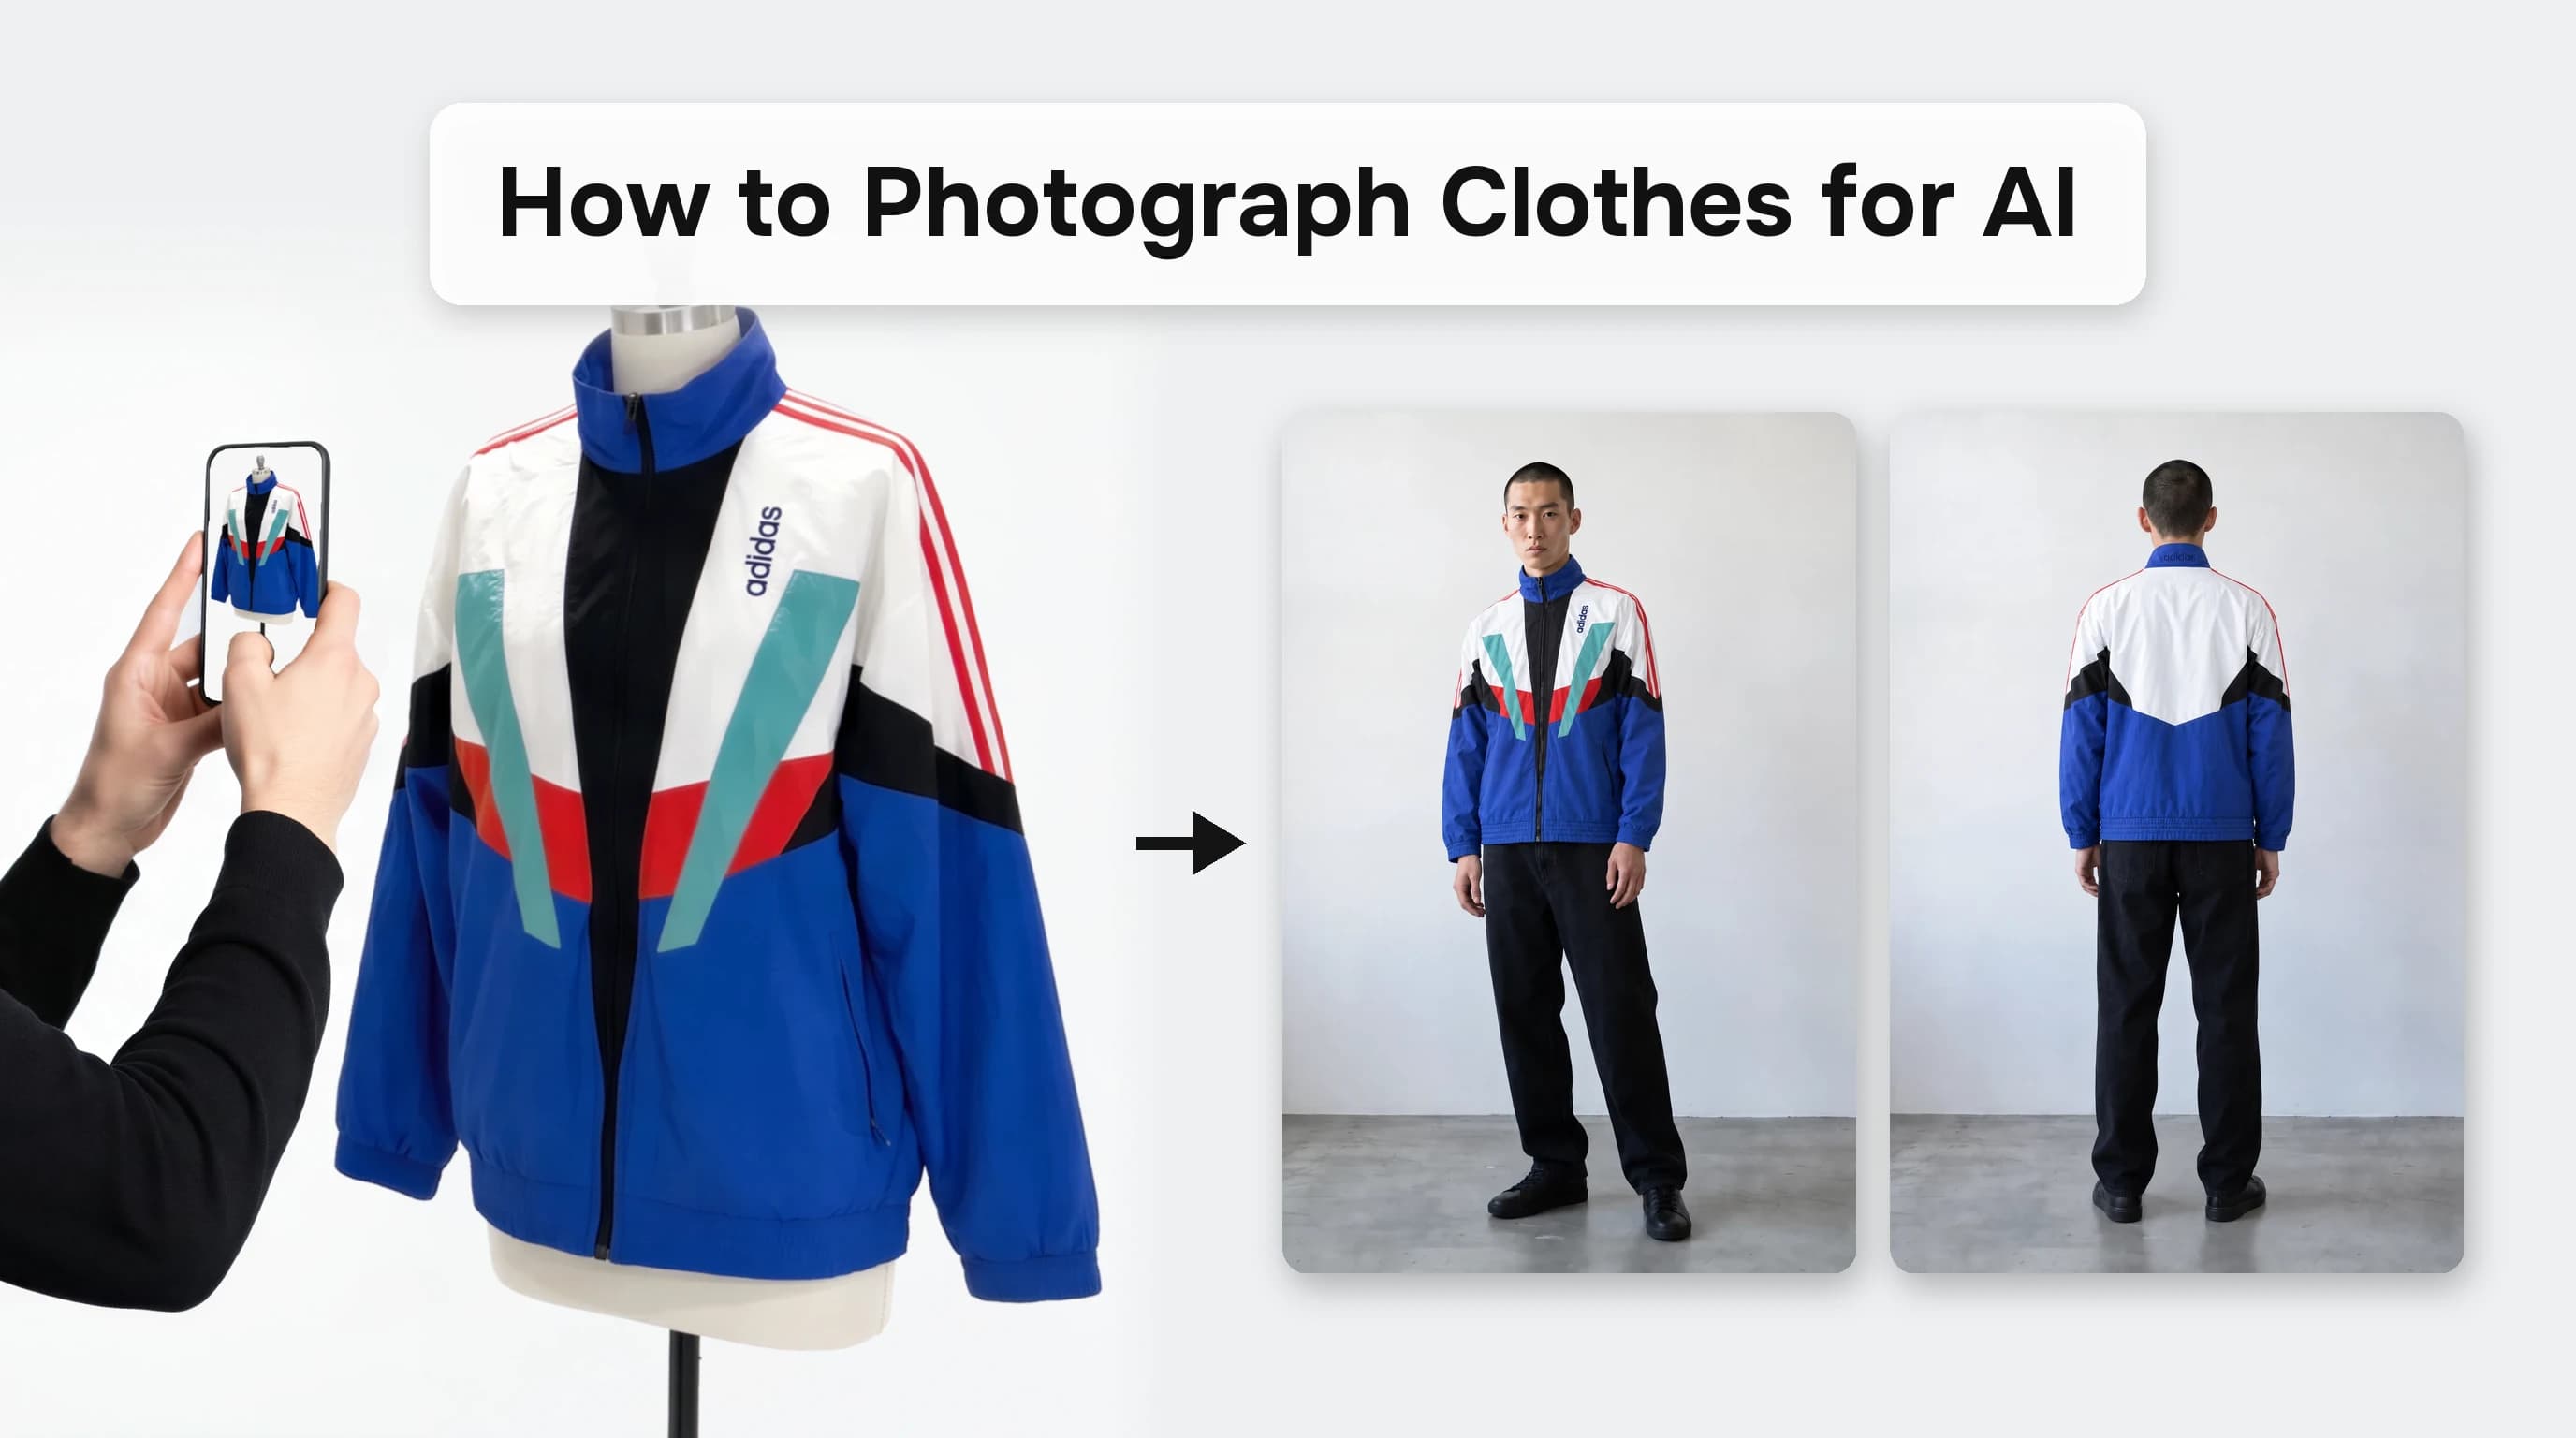
Hi, I'm Tony. I'm a photographer and the Creative Engineer at FASHN. One question our customers ask is simple: what photo of my product should I upload?
Most advice online says to use a flat lay or a ghost mannequin. I couldn't find anyone who had actually tested it. So I did.
I took one jacket and photographed it 12 different ways. I ran every set through the FASHN Agent with the same short message. Then I compared every result to the real jacket. Almost any photo works. Four things make it right.
Who the Photo Is For
Shooting clothes for AI felt backwards at first. As a photographer, I was trained to shoot for people. You pick flattering light. You add shadows for depth. You pin the fabric so the fit looks perfect. You hide what doesn't look good.
For AI, nobody ever sees your photo. It isn't the final picture. It's a set of instructions for the picture the AI is going to make. And the AI believes everything you show it. Shoot in warm light and it decides the jacket is cream. Skip the back and it makes one up.
So the best photo for AI is often the most boring one. Plain light, every side, nothing hidden. Your job is to tell the truth about the garment. The AI makes it beautiful.
My Setup
I shoot in my living room. I have a white backdrop, a mannequin, a smart bulb I can switch between warm and neutral, and my iPhone 15. Nothing fancy. That was the point. I wanted to test what most people already have at home.
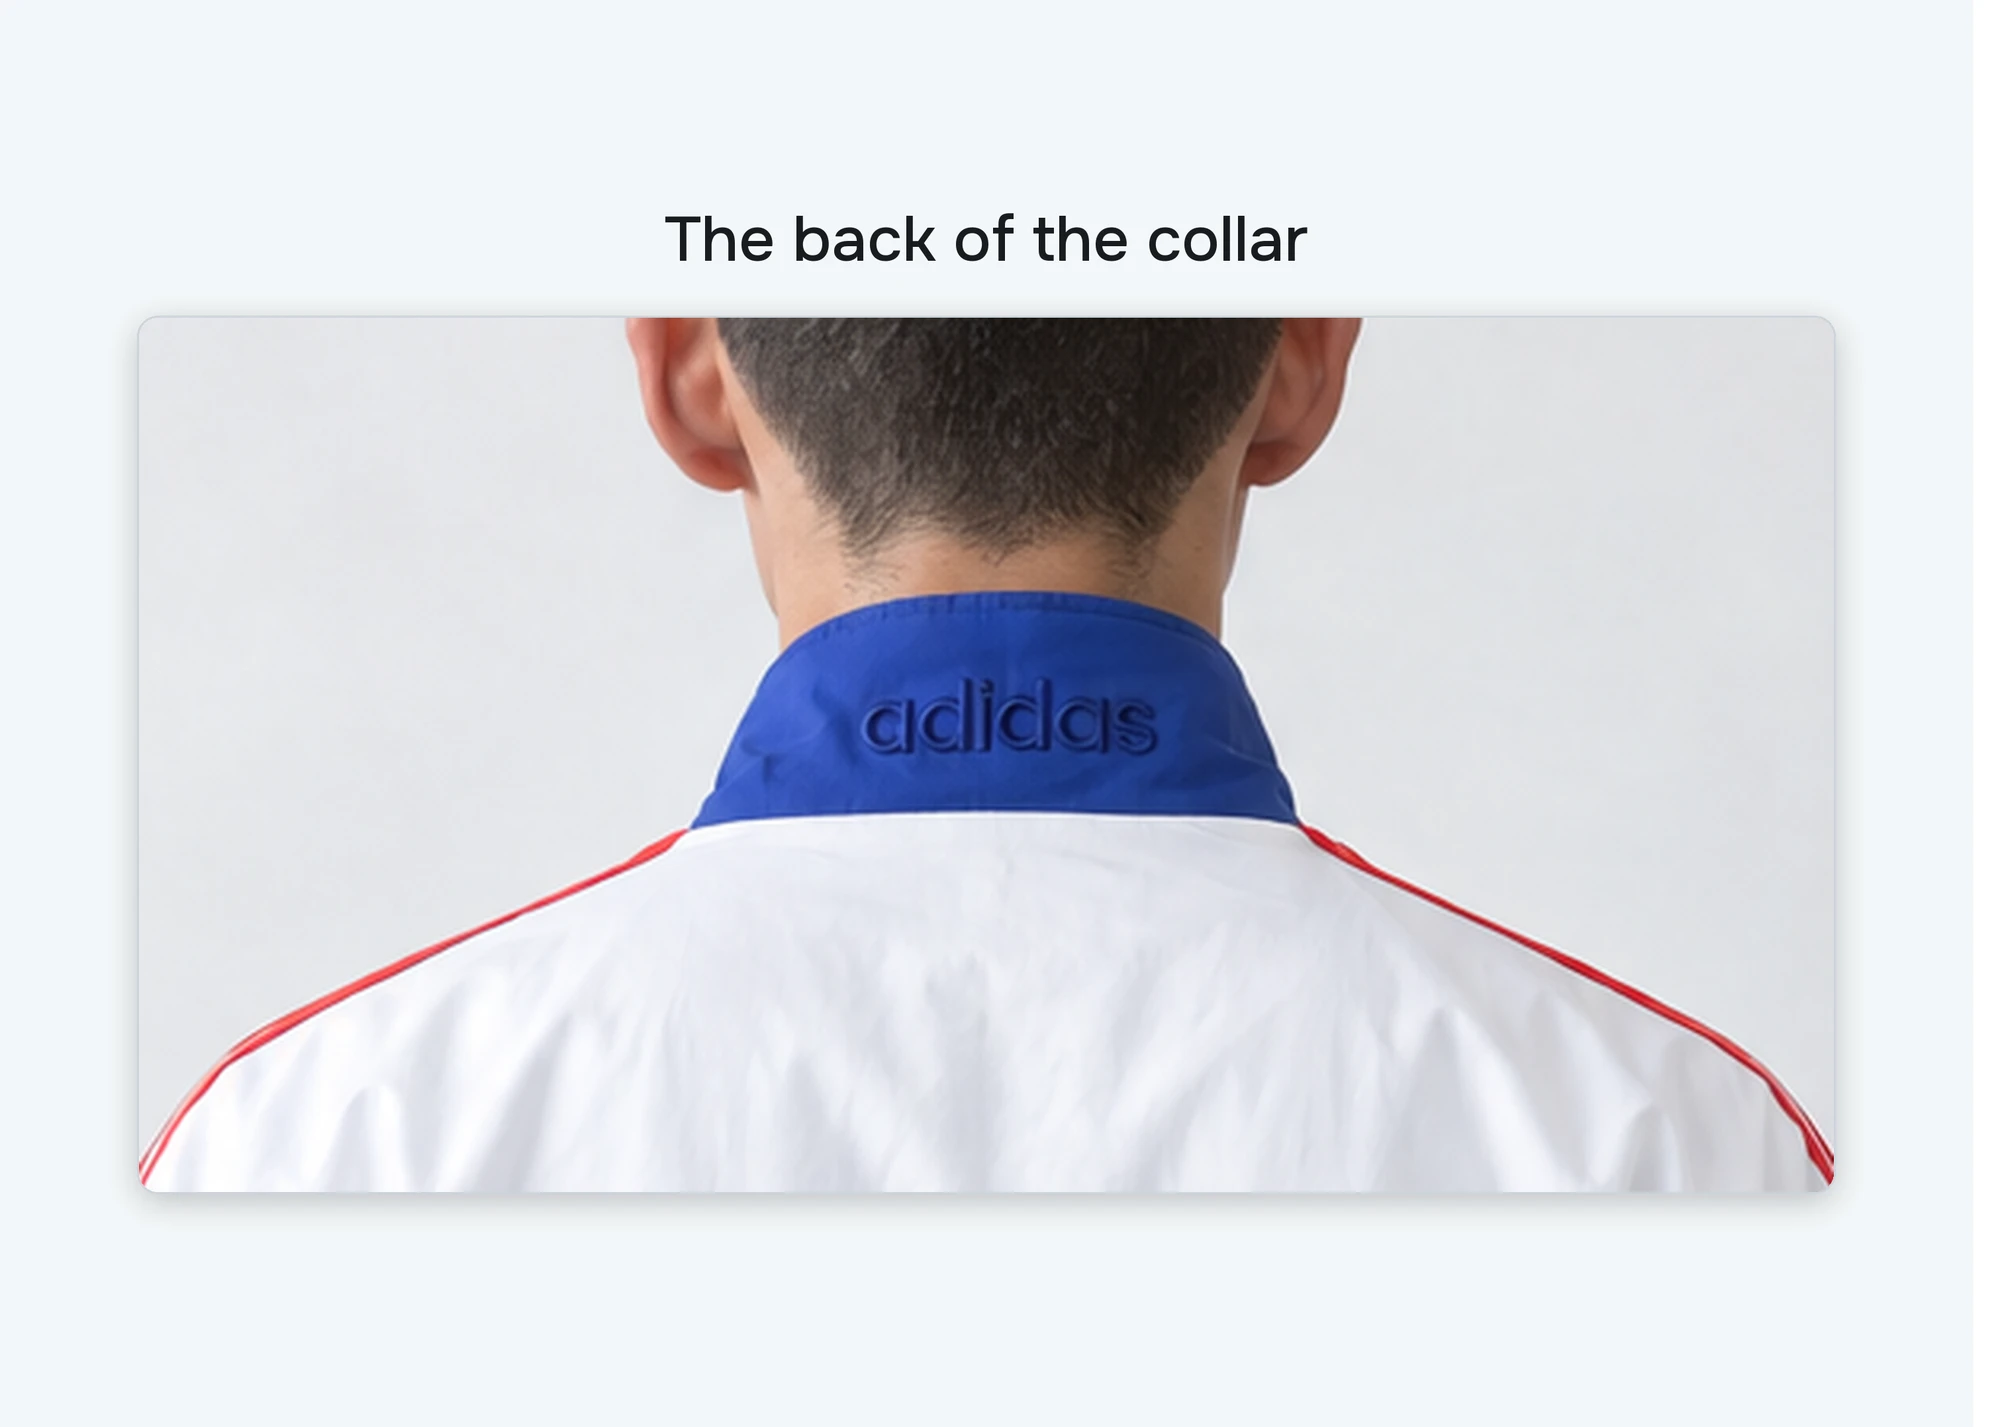
I picked my vintage track jacket on purpose. It has five flat colors, three stripes down each sleeve, a small stitched word on the back of the collar and three rows of stitching on the waistband. That gives the AI a lot of ways to get it wrong.
I photographed it three ways: as a flat lay on my wood floor, on my mannequin and on me. I shot each of those under four lights: a warm bulb, a neutral bulb, daylight from the window and the flash on my phone.
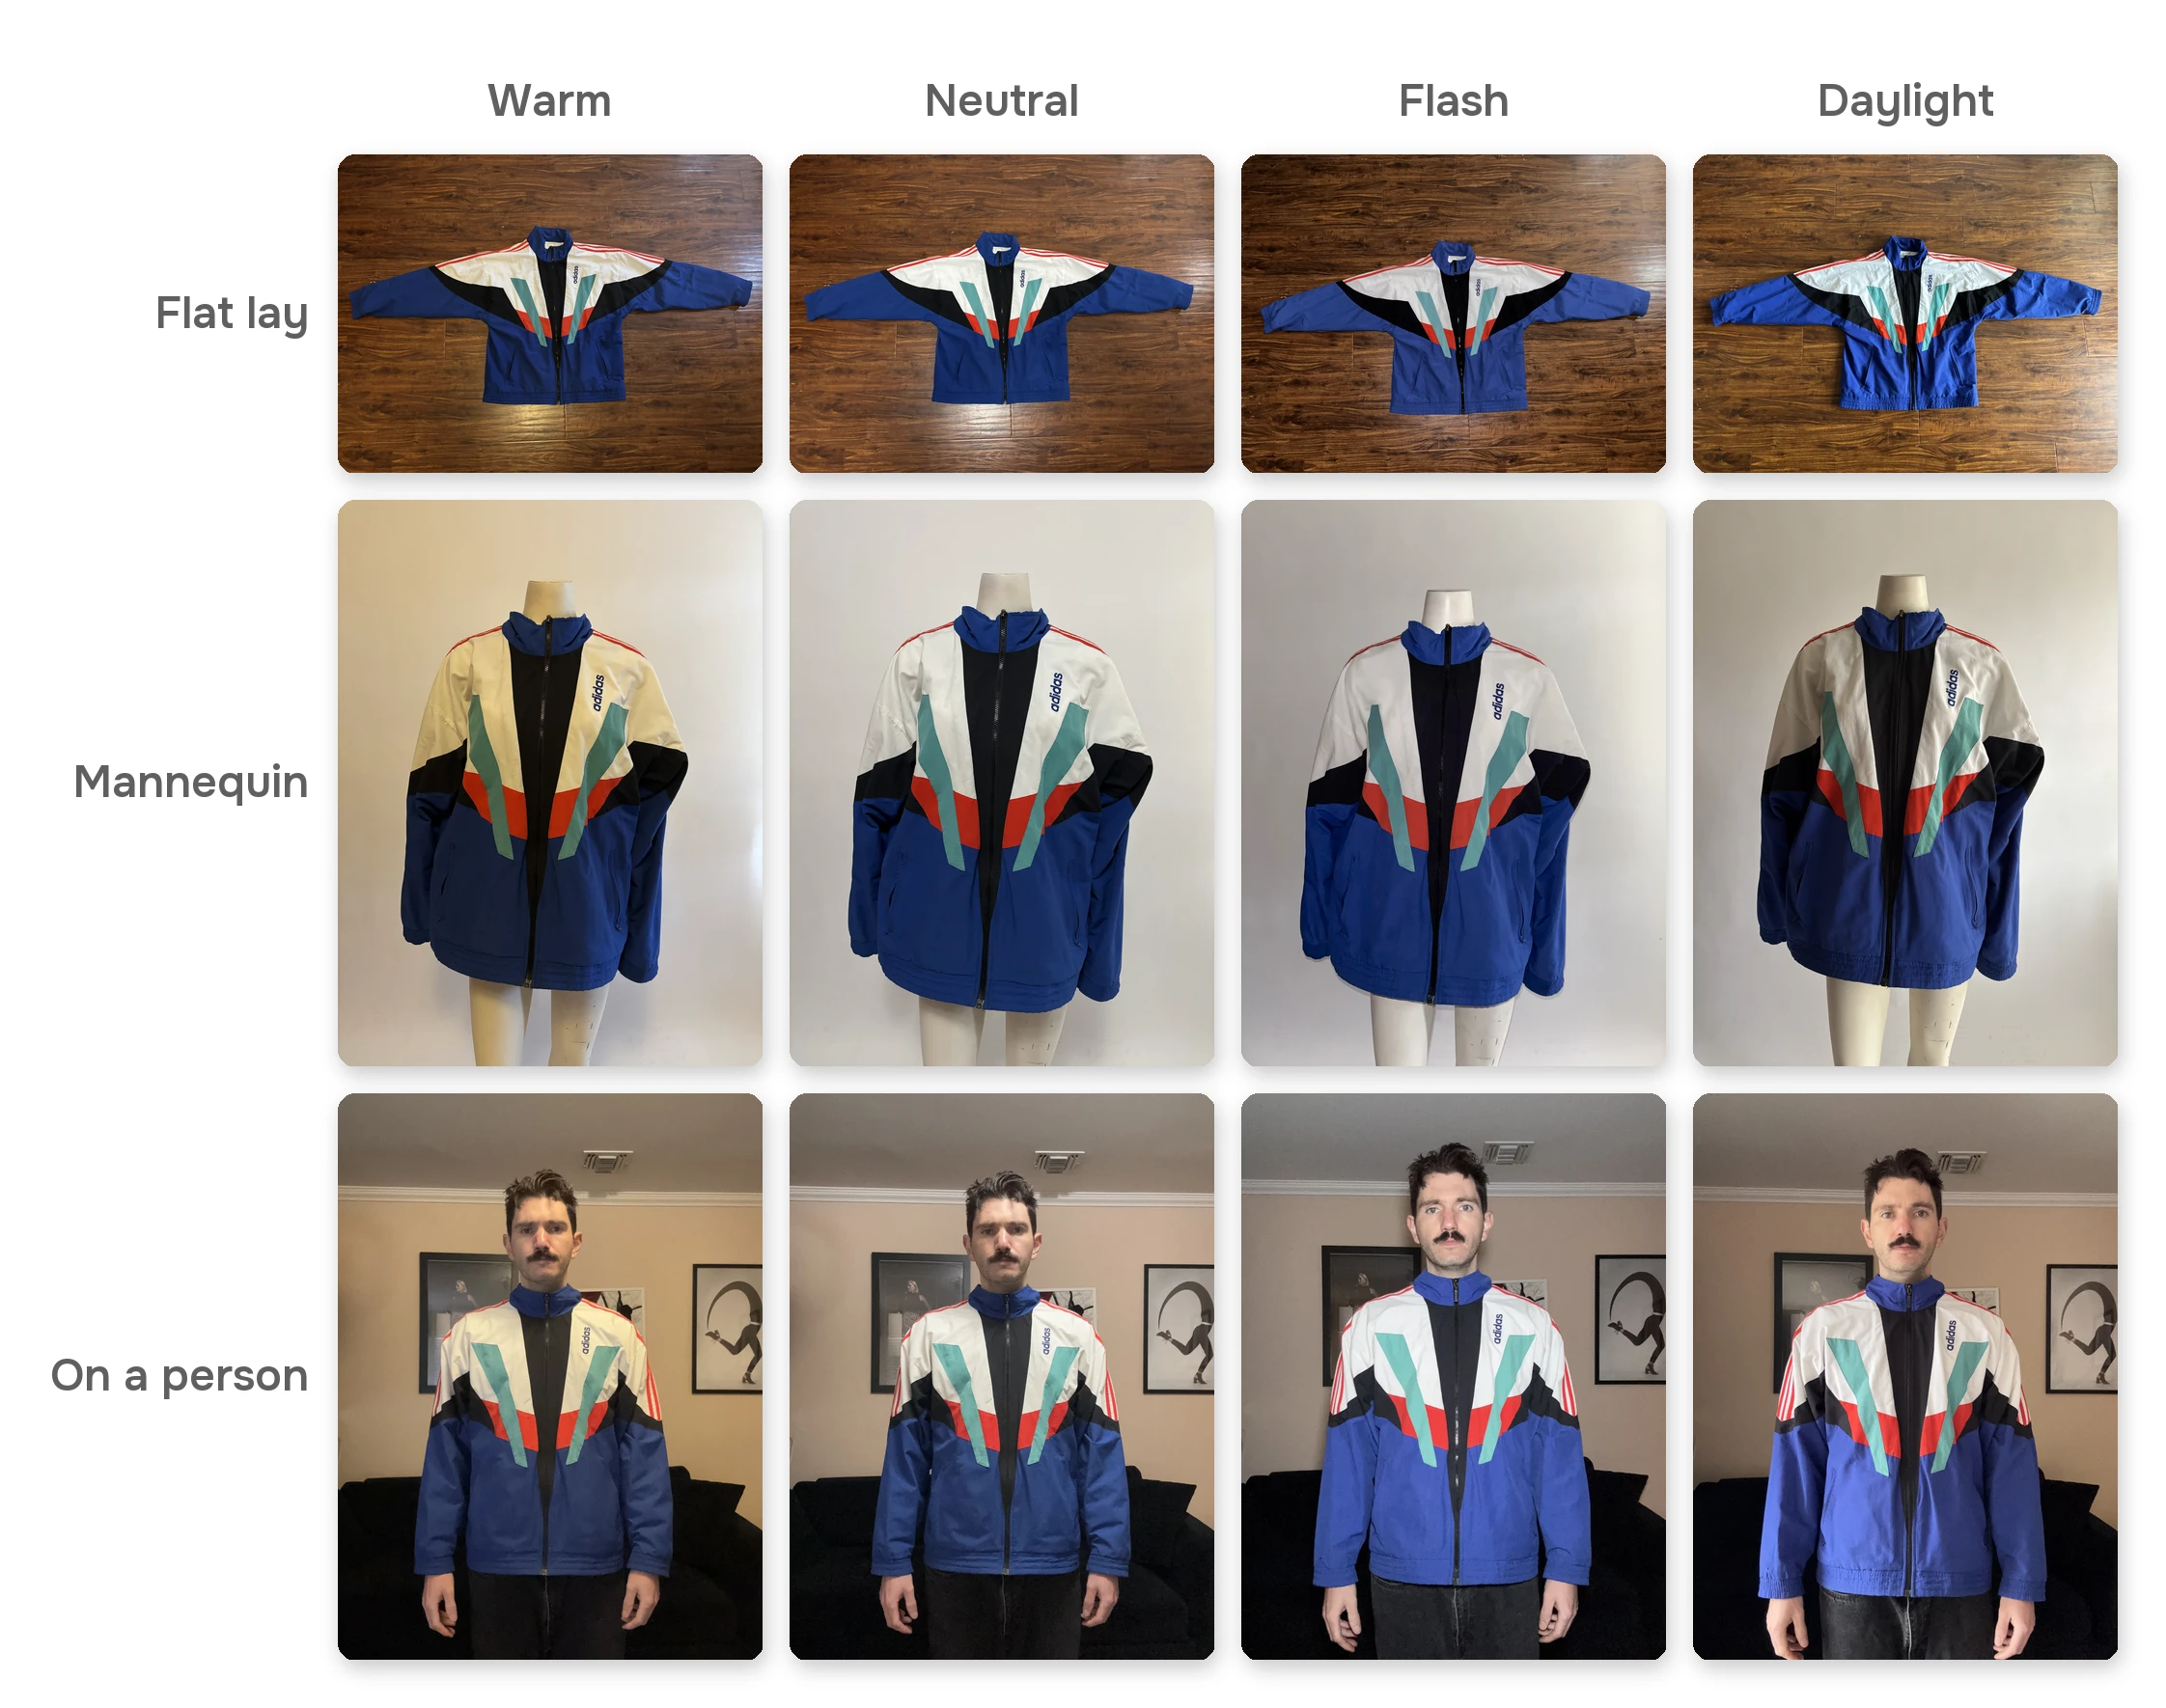
The 12 sets: three ways to present it, four kinds of light.
The rules were the same for every set. I used one model from the Elements library. I started a new conversation every time. The settings were 2:3, 2K and Balanced. And I sent the same message every time:
Put this jacket on him. Create three separate images: a front, a side and a back view.
Here is what I learned.
1. Views: Shoot the Front and the Back
This one surprised me the most. I gave the Agent only the front of the jacket, just to see what it would do. It had never seen the back, so it made its best guess: a back that matched the front, with the black center panel, the teal stripes and the red blocks. It's a fair guess. But the real back is mostly white.
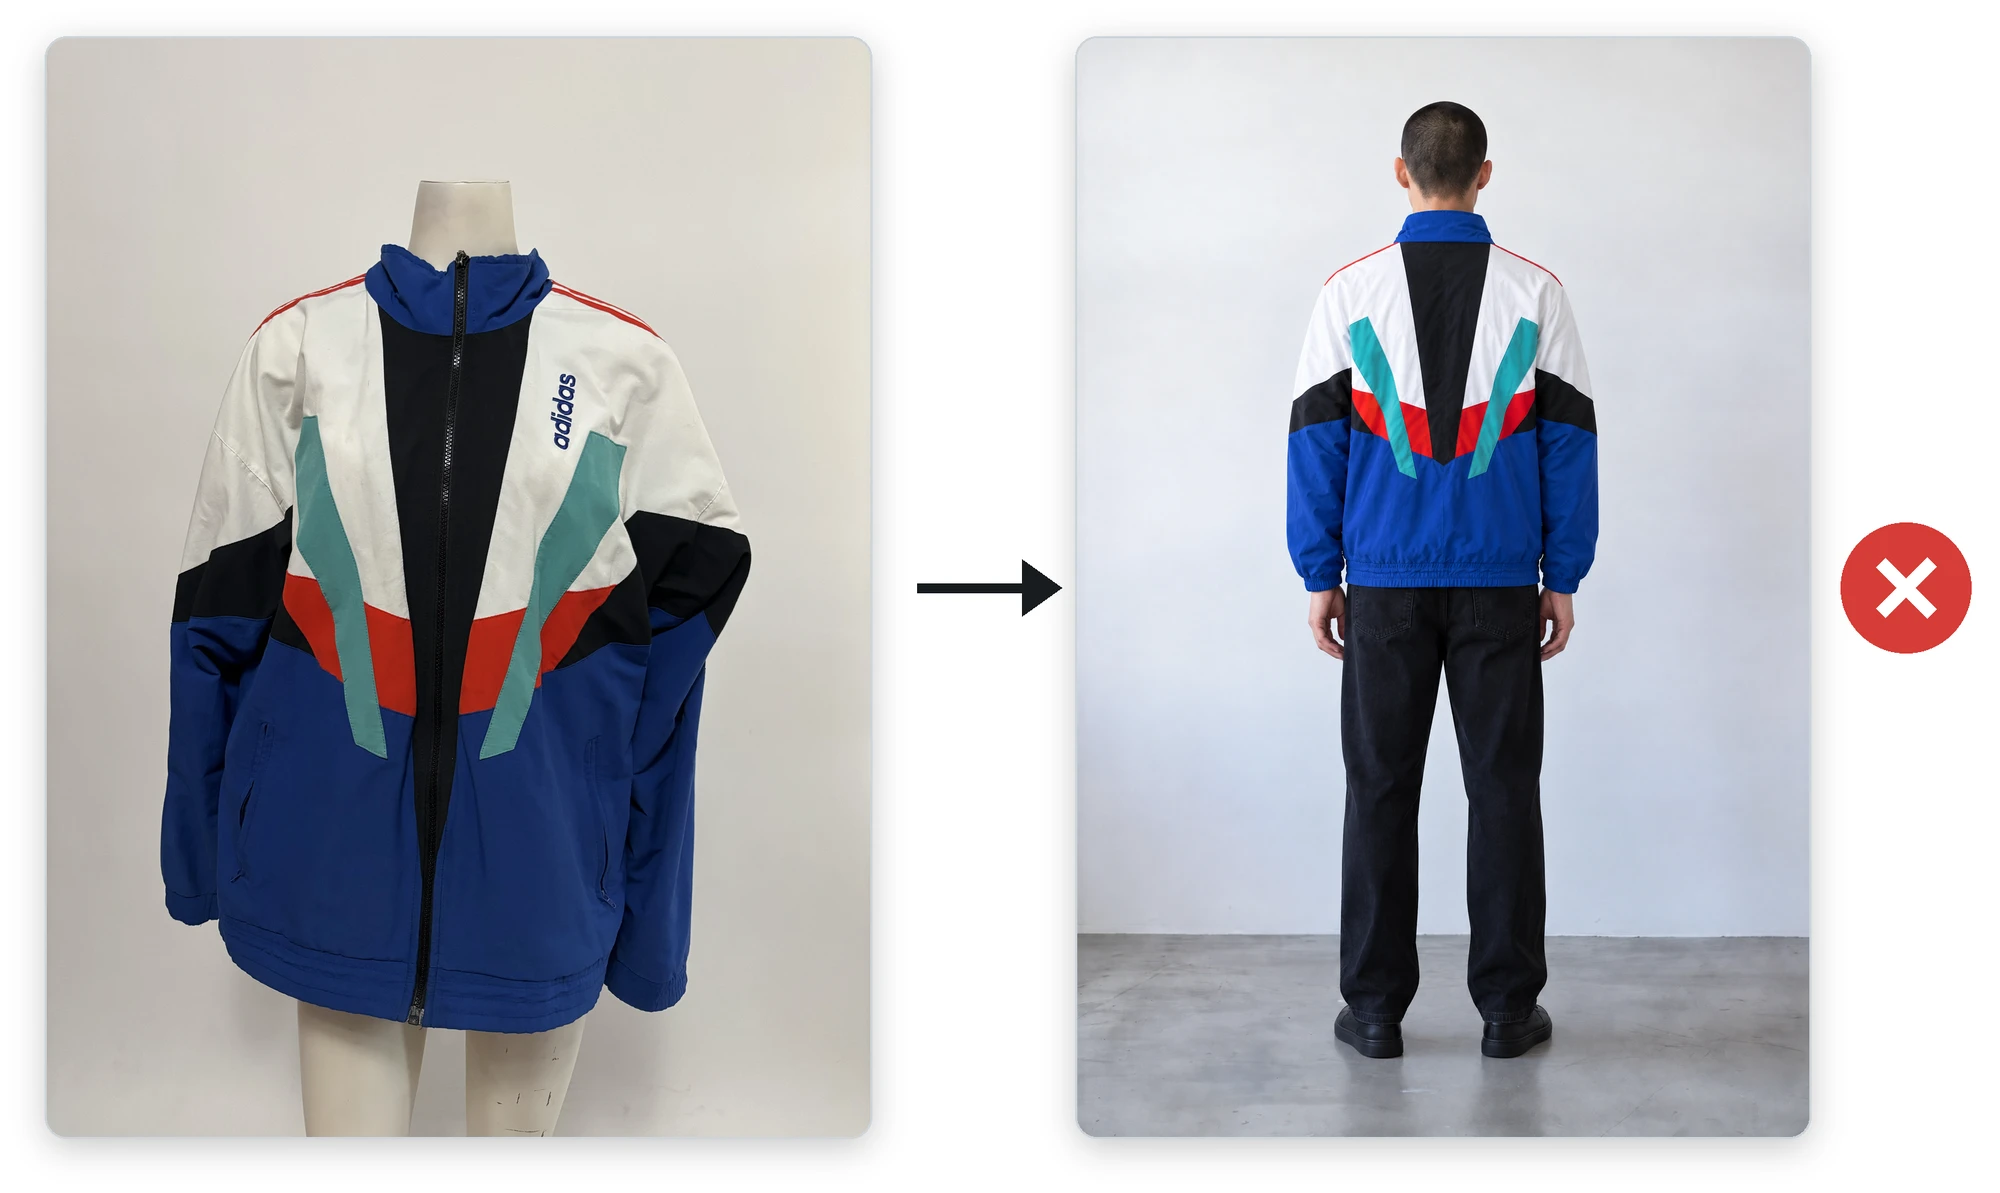
Front photo only. The back it made is just the front again.
The AI can't know what it hasn't seen. So it fills the gap with the closest thing it has, and that's the front. When I added a back photo, the back came out right.
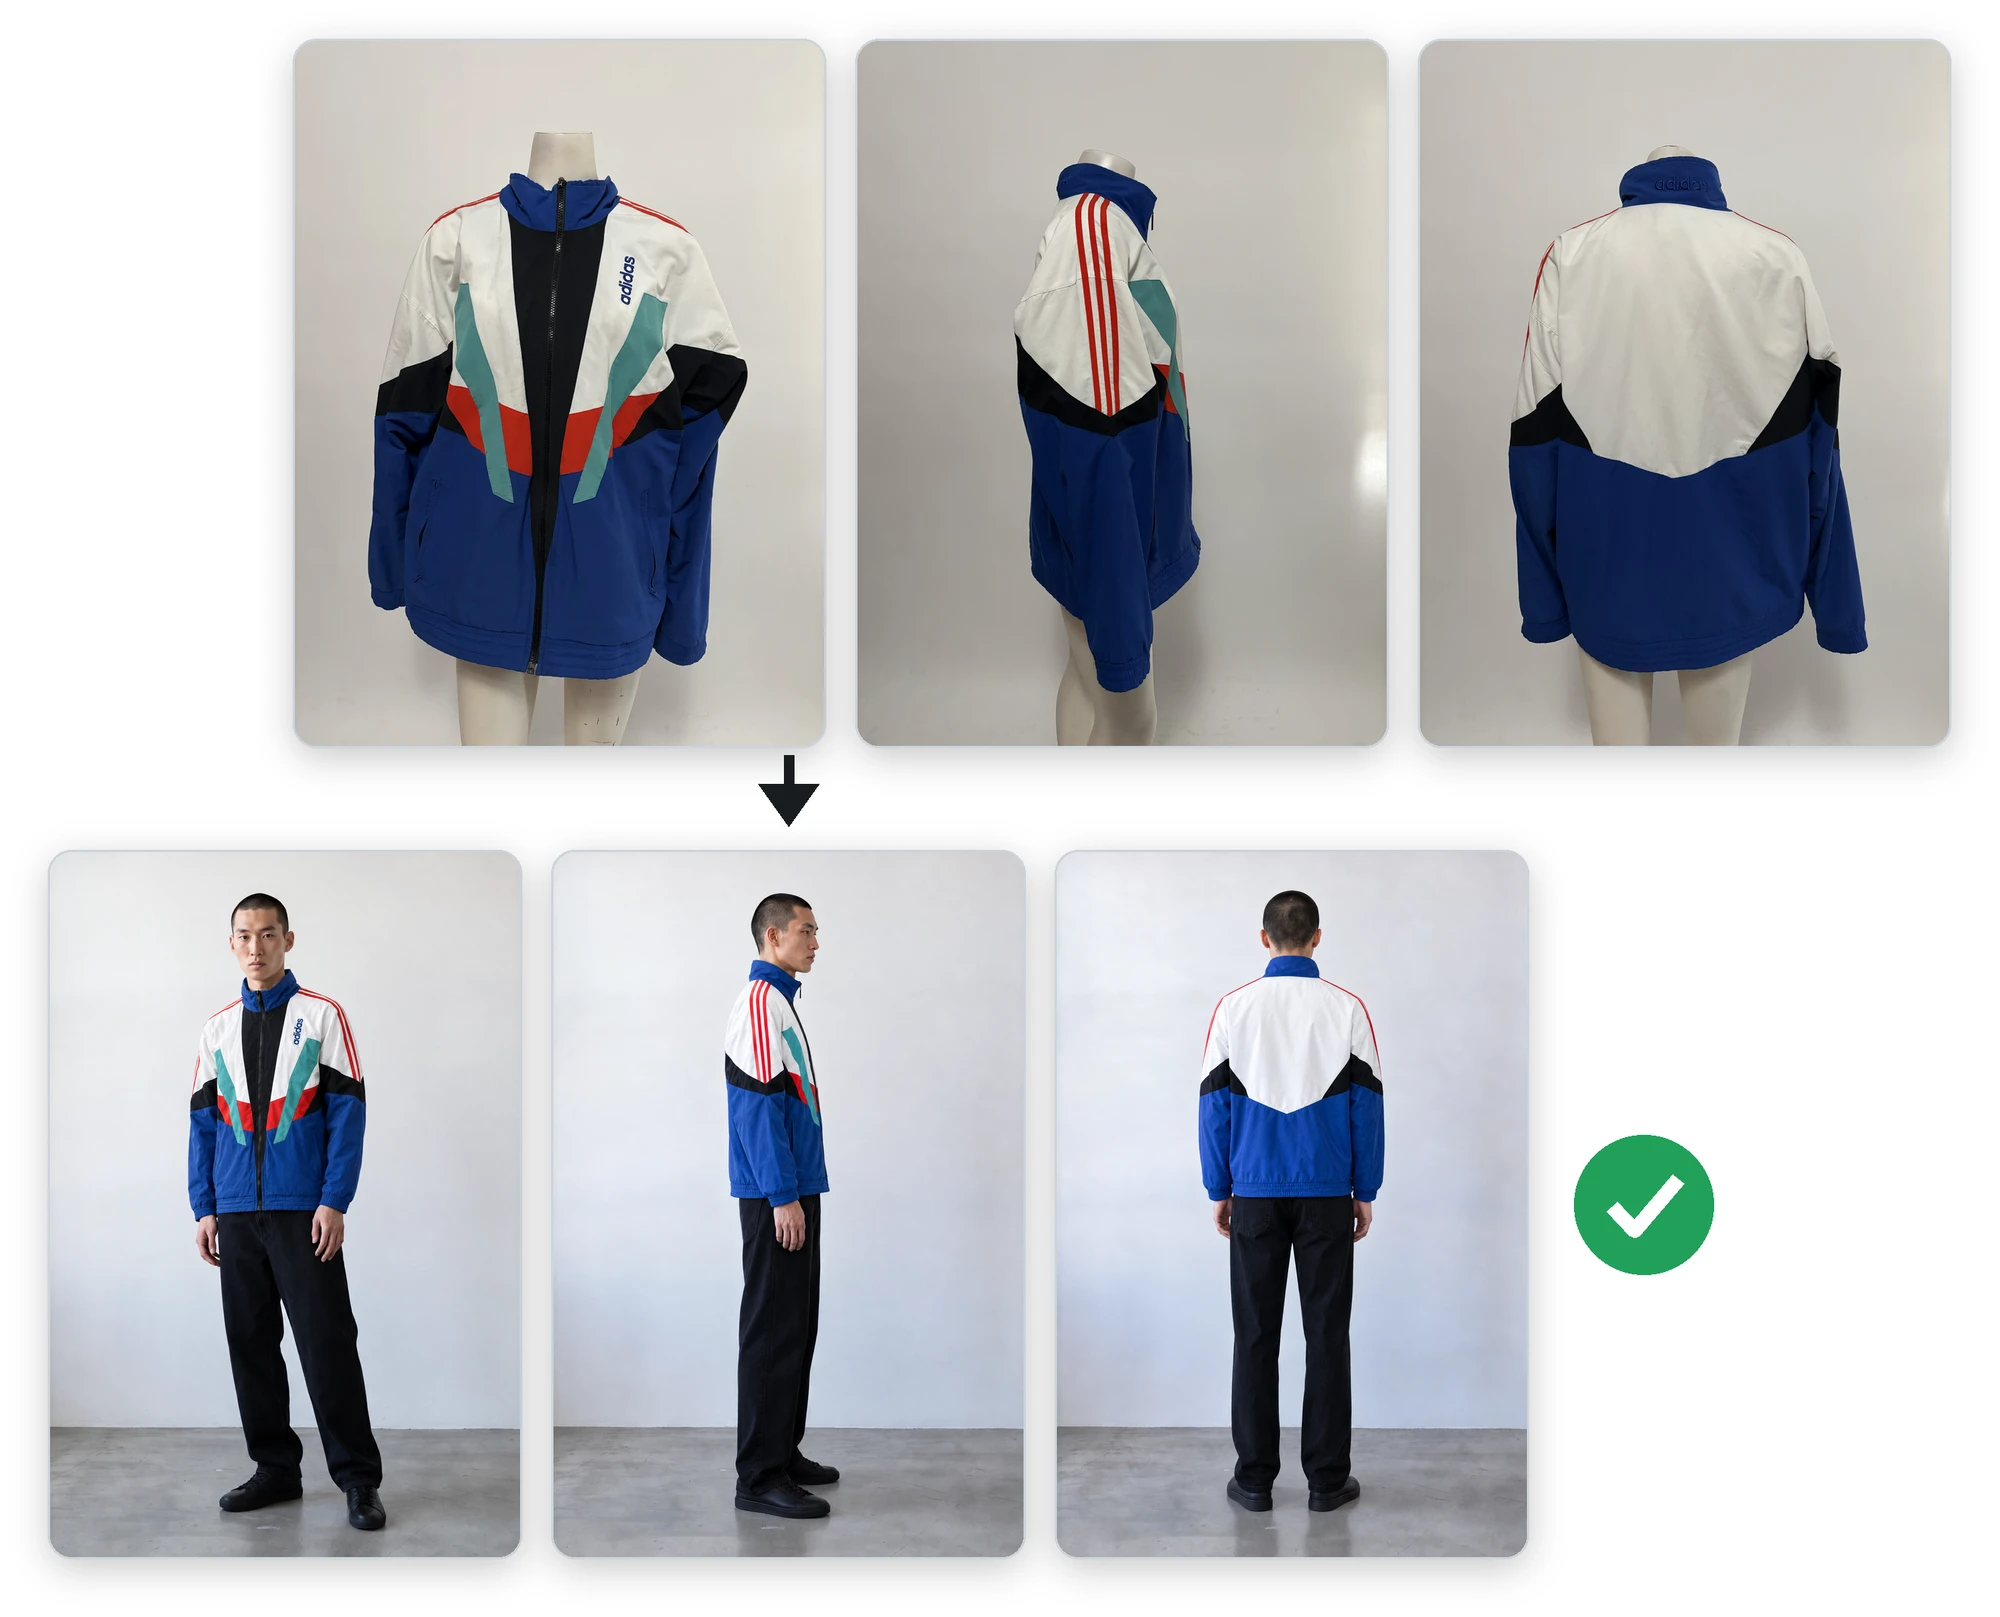
Front, side and back in. Front, side and back out, all three right.
A side photo is a bonus. My jacket has three stripes running over each shoulder and down the sleeve. The front and the back only show part of them. The side shows the whole thing.
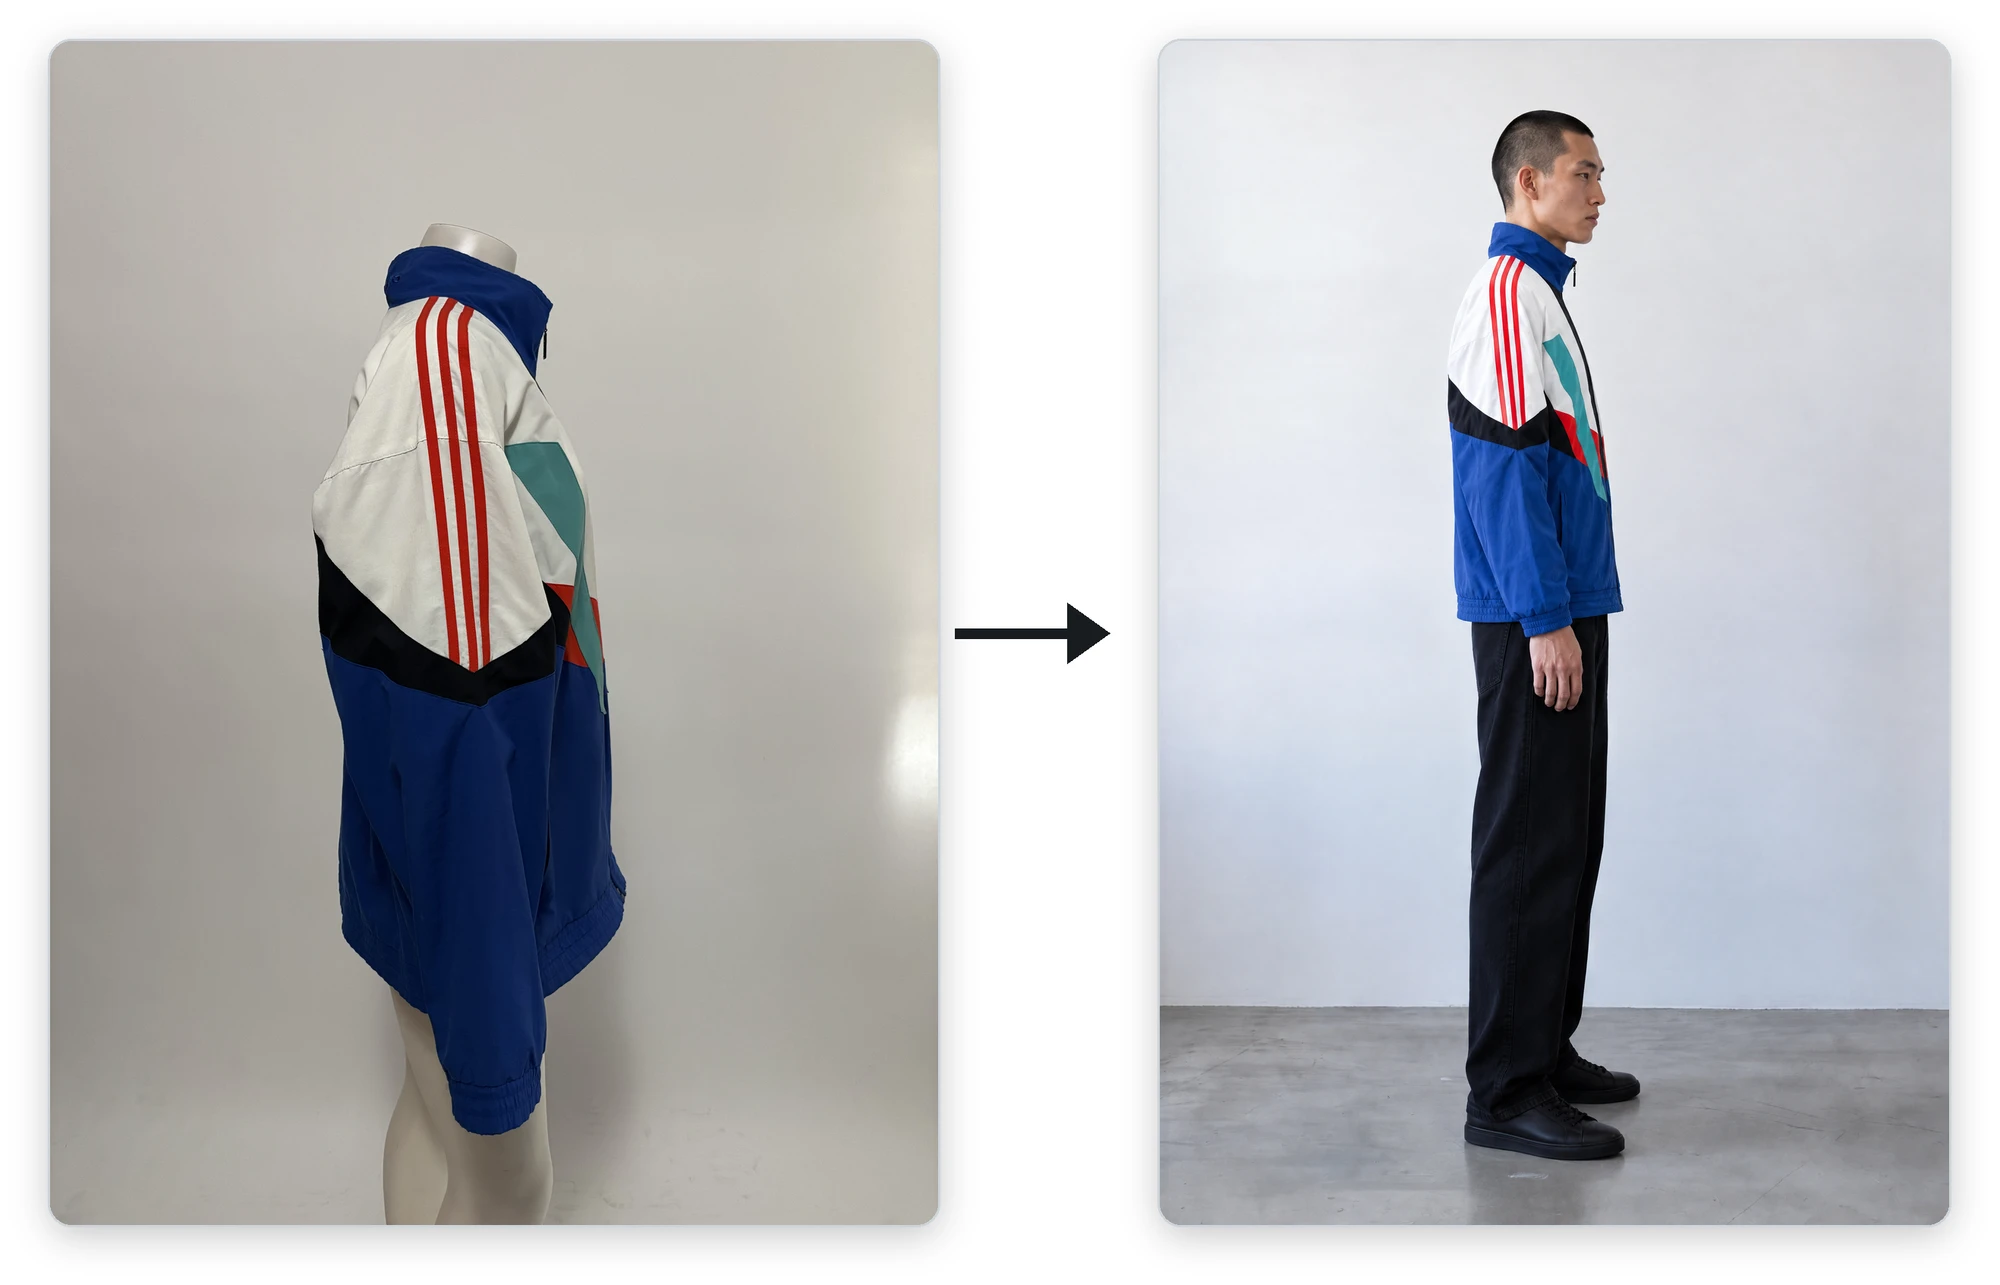
2. Fit: On a Person Is S Tier
If you ask me how to photograph your clothes, my first answer is to put them on a person. But I know that's not always possible. Maybe nobody is around to wear it, or you have a hundred pieces to shoot. So here is how I'd rank the options.
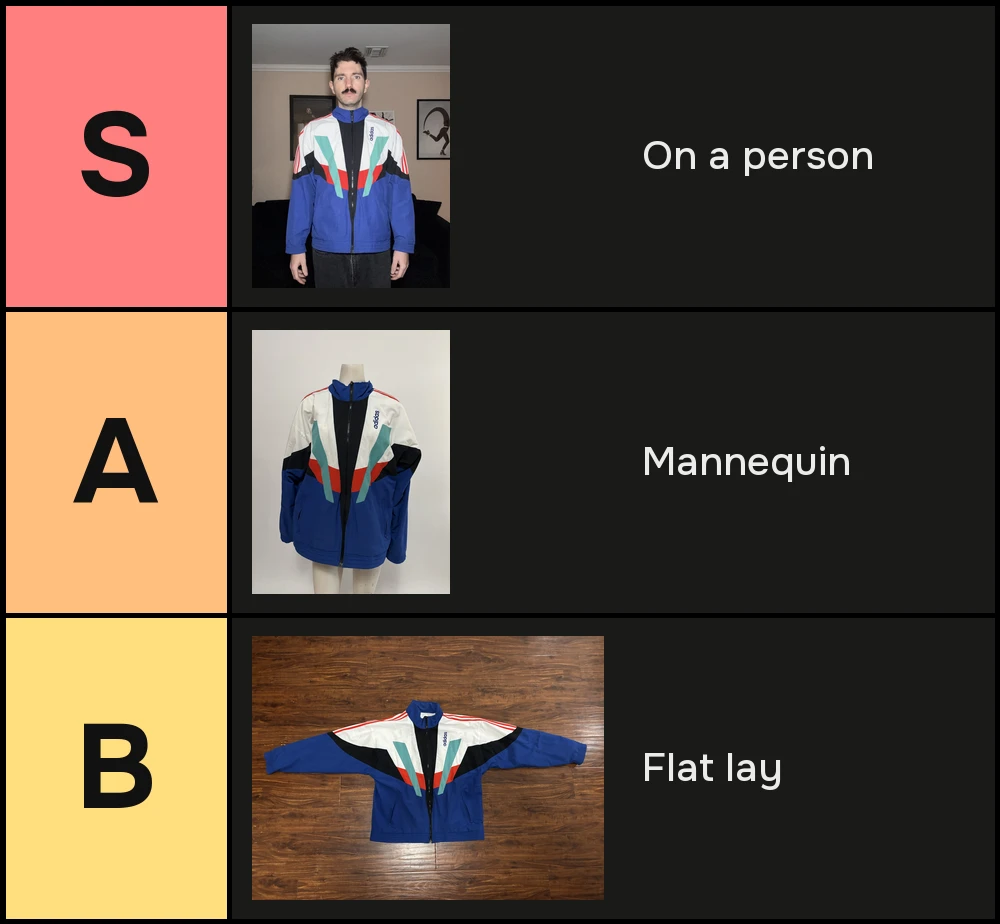
S tier: on a person. If you can shoot it on a person, do it. A body shows the AI how the piece actually sits: where the shoulders land, how long the sleeves are, how the fabric falls. I wore the jacket myself. You don't need a model.
A tier: a mannequin. If no one can wear it, use a mannequin. It still gives the AI the shape of a body. It's just a little stiffer than a real person.
B tier: a flat lay. No mannequin either? Lay it flat. There's no body in the photo, so the AI has to guess the fit. If it guesses wrong, you can always fix it with a few words, like "make it a little looser."
All three work. In my test every one of them got the front of the jacket right. Each step up the list just gives the AI a little more to go on.
3. Light: Neutral, Never Warm
I tested four kinds of light: a warm bulb, a neutral bulb, the flash on my phone and daylight from the window.
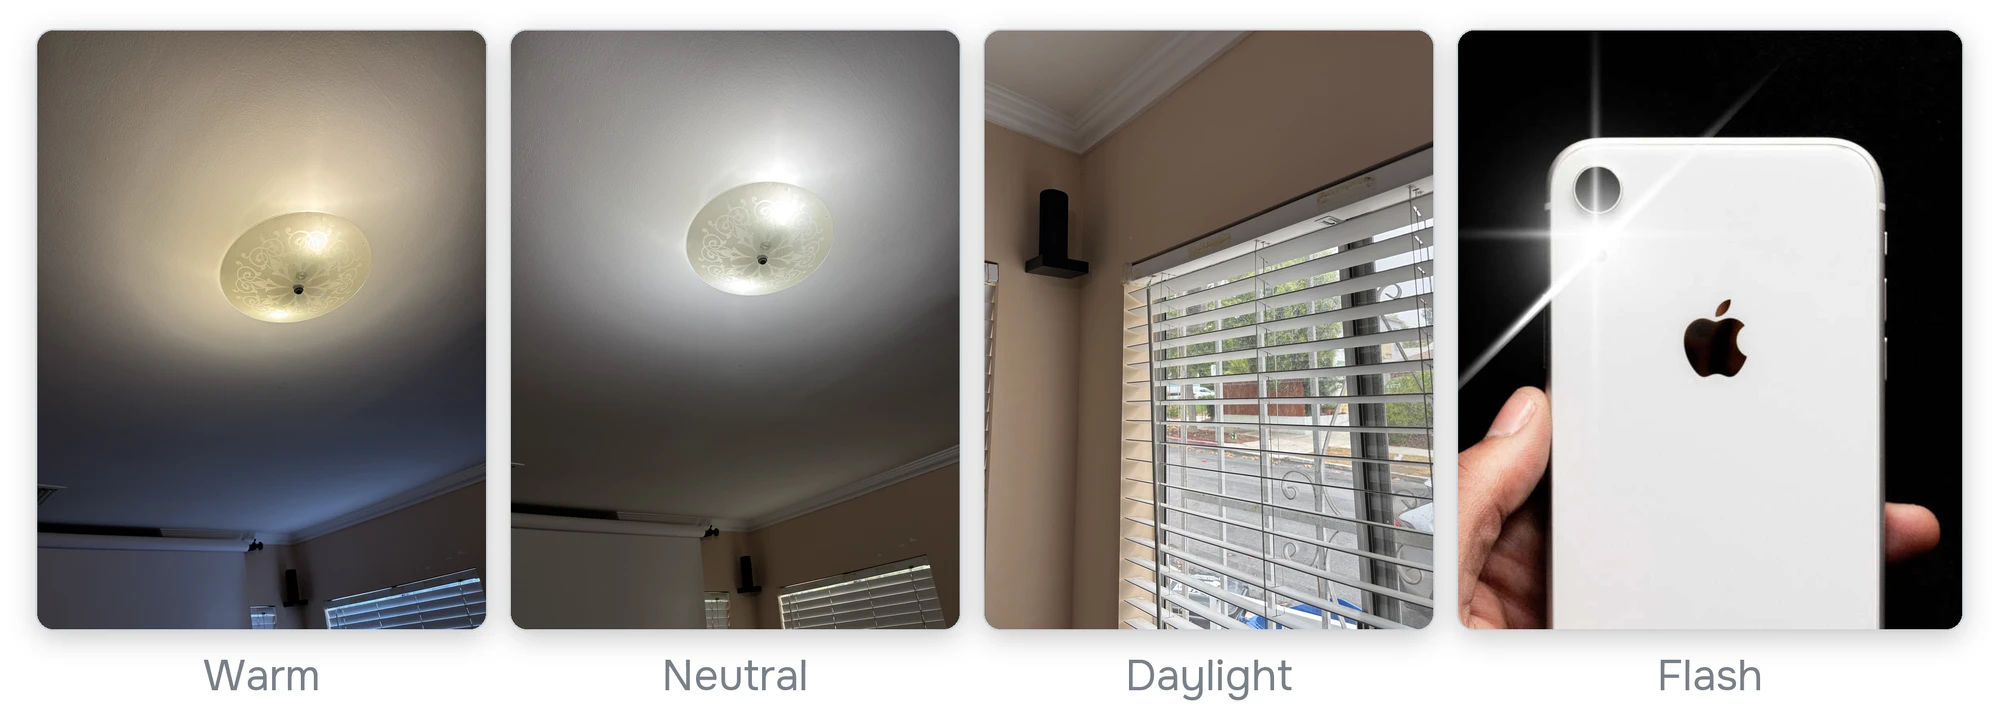
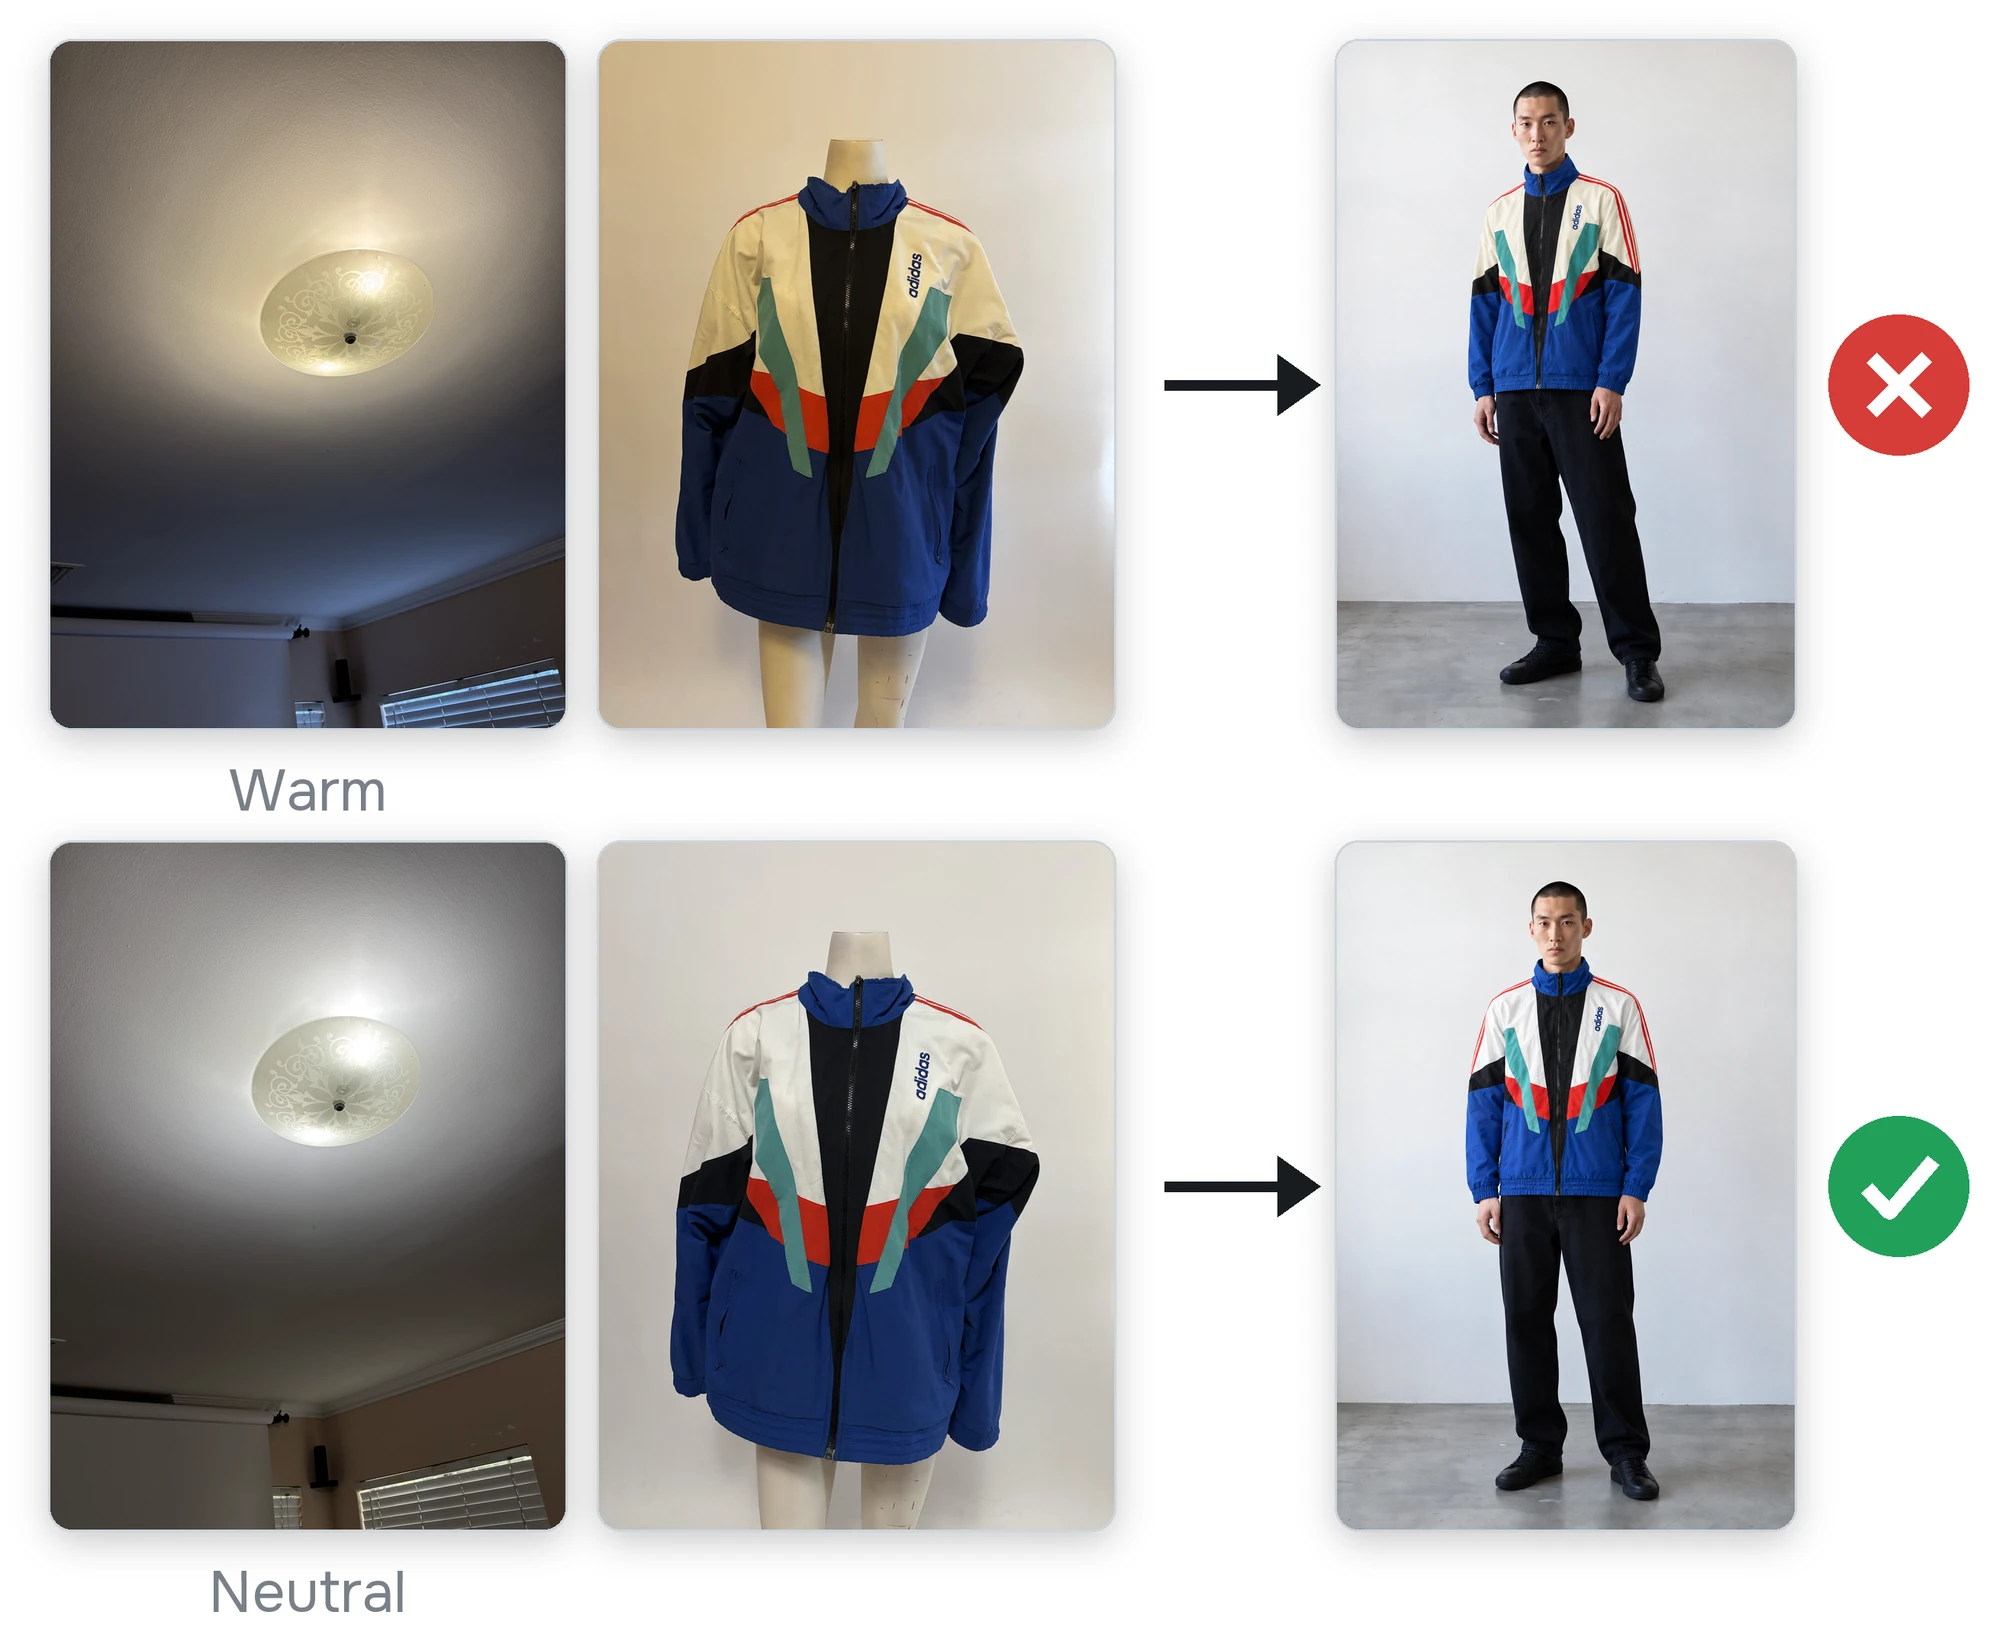
Warm light is the one to avoid. Under my warm bulb the white panels came back cream. The Agent even called them cream in the prompt it wrote. It had no way of knowing the jacket was white, because in my photo it wasn't.
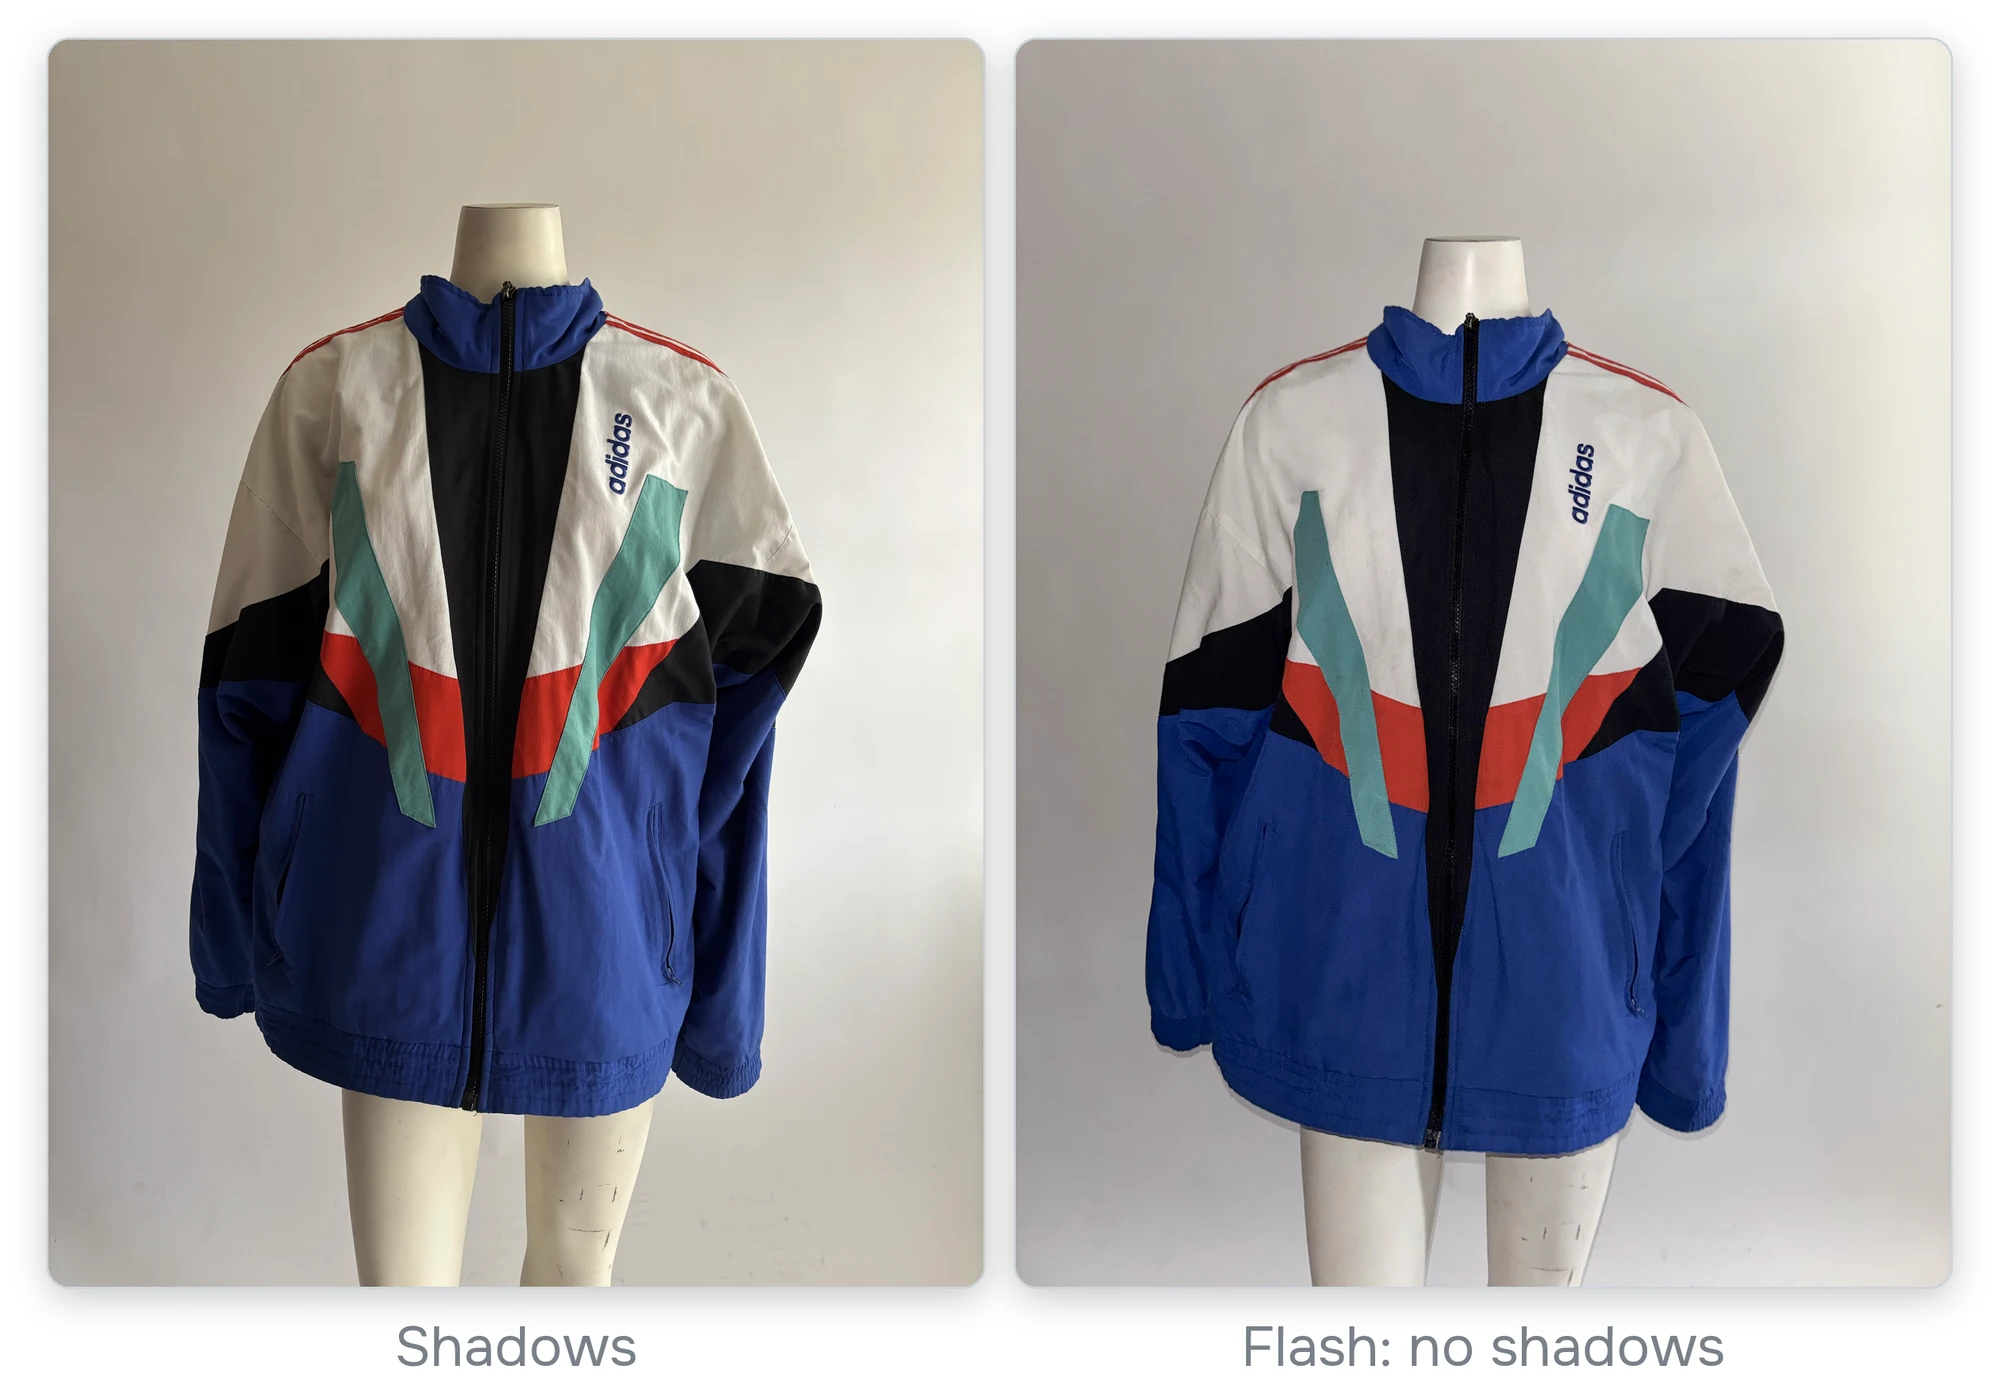
The flash was my favorite. It points straight at the piece, so there are no shadows. Light from above or from the side leaves shadows on the piece.
4. Details: Shoot Close Ups
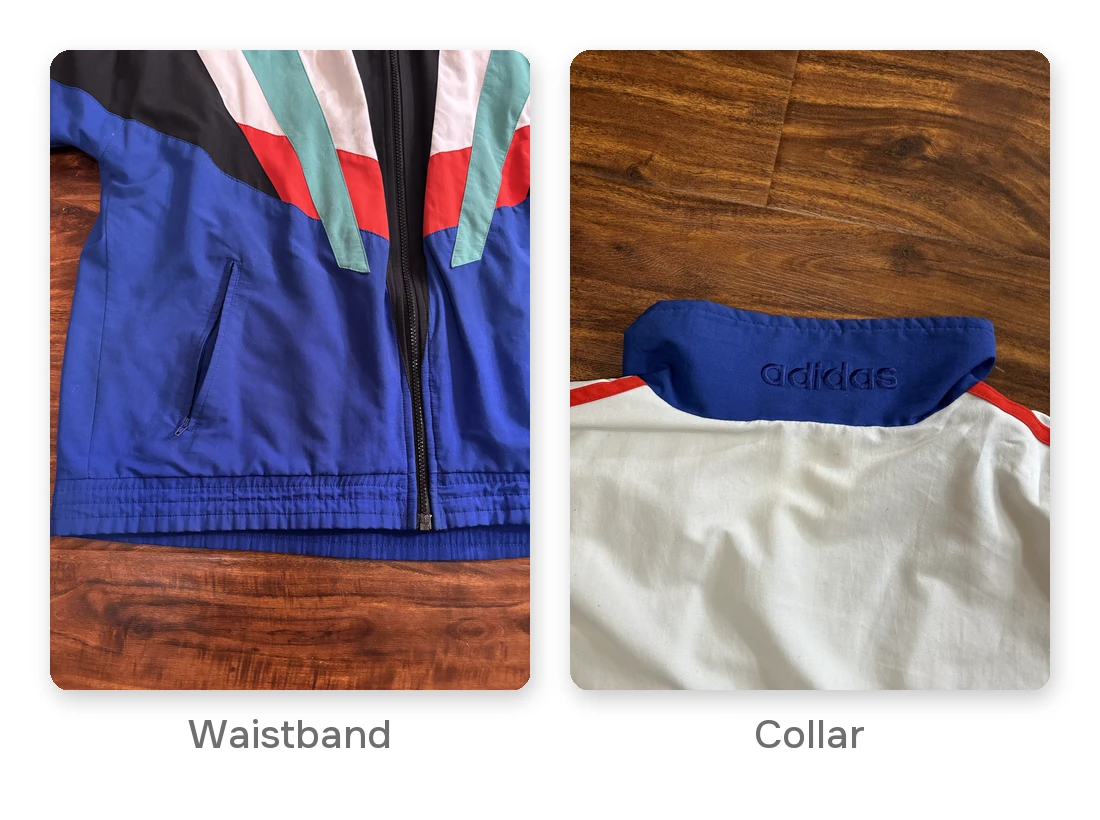
My jacket has small things that are easy to get wrong: three rows of stitching on the waistband and a word stitched on the back of the collar. Without close ups they were hit and miss. Some waistbands came back with two rows. Most of the time the word on the collar wasn't there at all.
So I shot close ups. I laid the jacket flat and shot just the waistband, then just the collar. Flat lays work great for close ups.
Here is what the waistband looked like when I gave the Agent only my photo of the whole jacket. In a photo of the whole jacket the stitching is tiny, so the AI guessed. It made two rows.
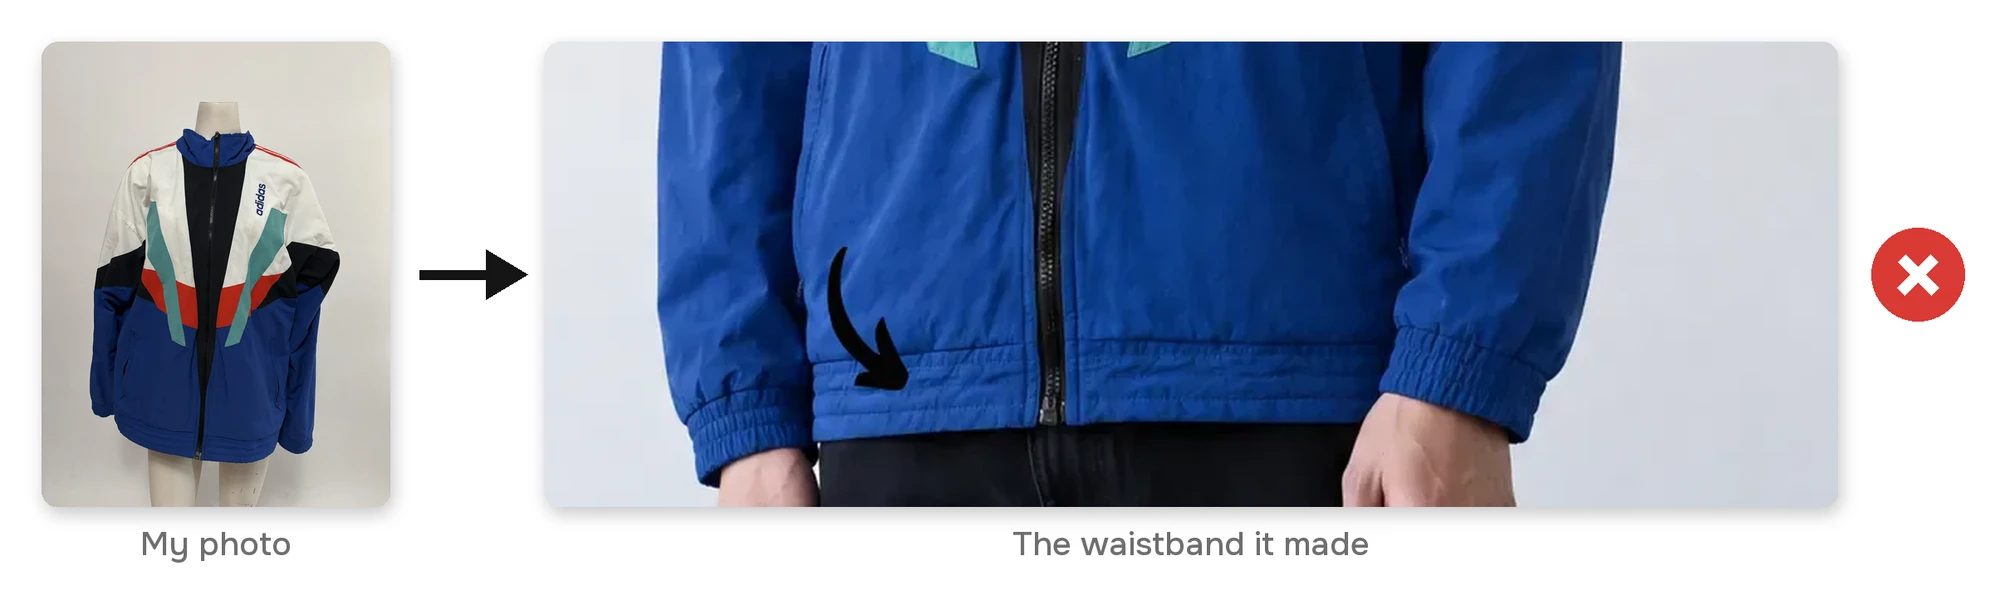
Without a close up: two rows of stitching instead of three.
Then I added the waistband close up to the same set of photos. Now the AI could actually count the rows. It made all three.
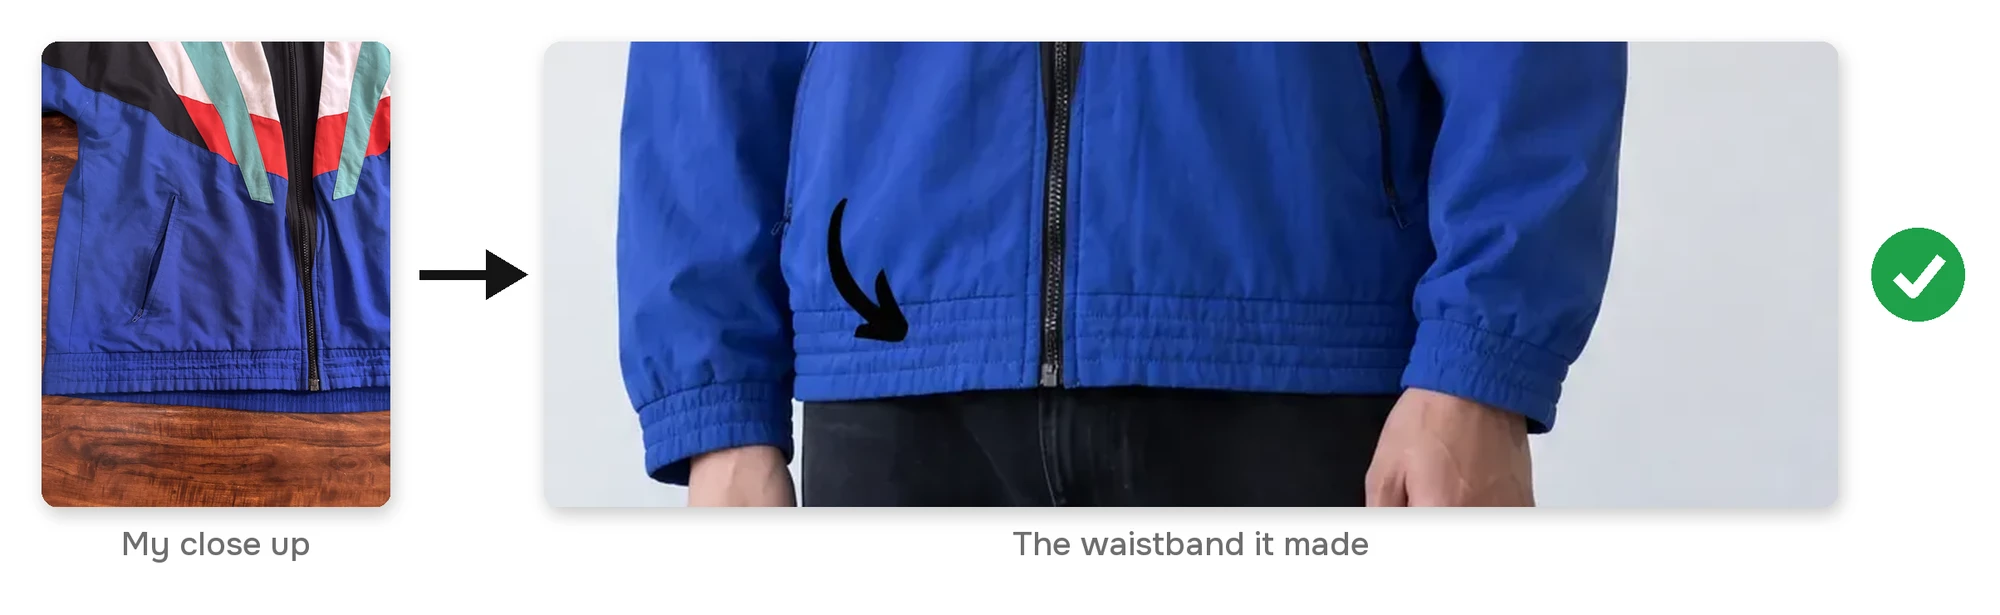
Putting It All Together
Here is the set that worked best: the jacket on me, front, side and back, shot with the flash, plus two close ups. This is the exact run from the video.
In the Agent I upload the model first. Then the front, side and back photos. Then the close ups. Putting the model first makes it clear who should wear the jacket.
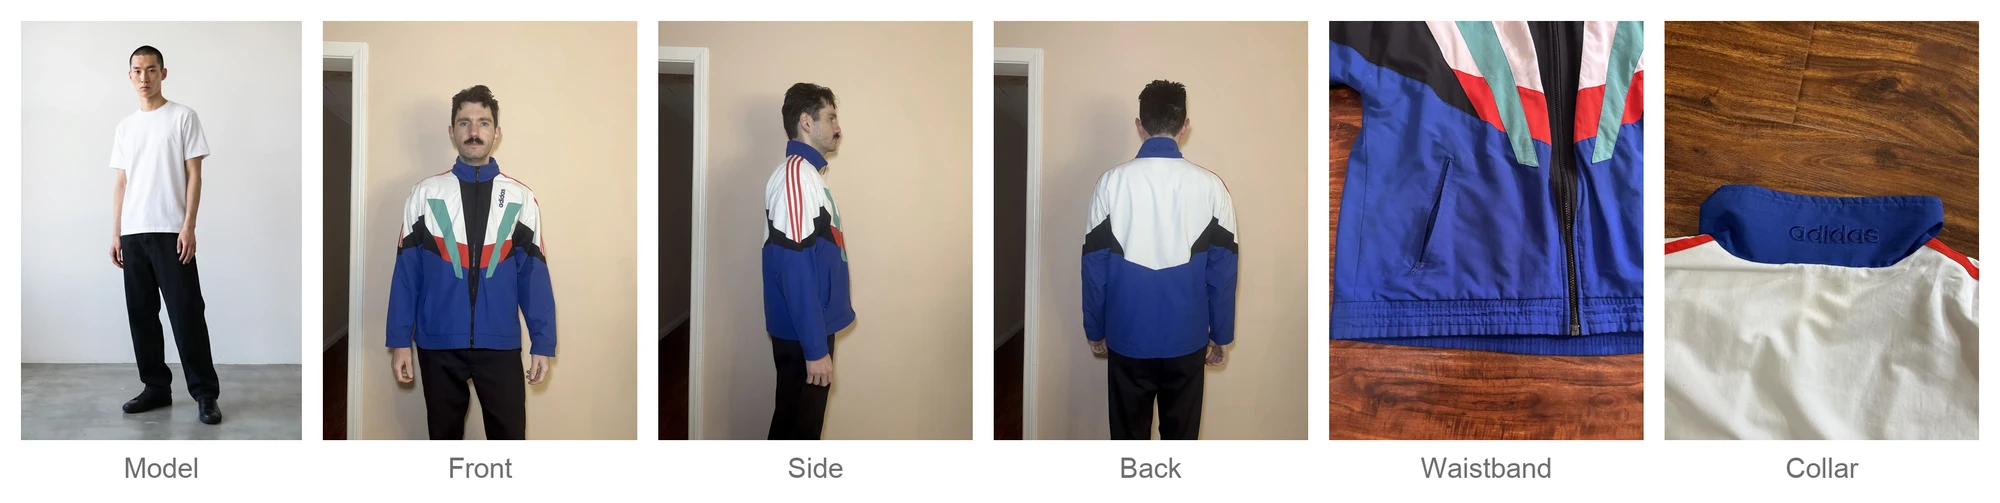
The upload order: the model first, then front, side and back, then the close ups.
Then one short message:
Put this jacket on him. Create three separate images: a front, a side and a back view.
I also ask for "three separate images." Without those words it sometimes puts all three views into one picture.
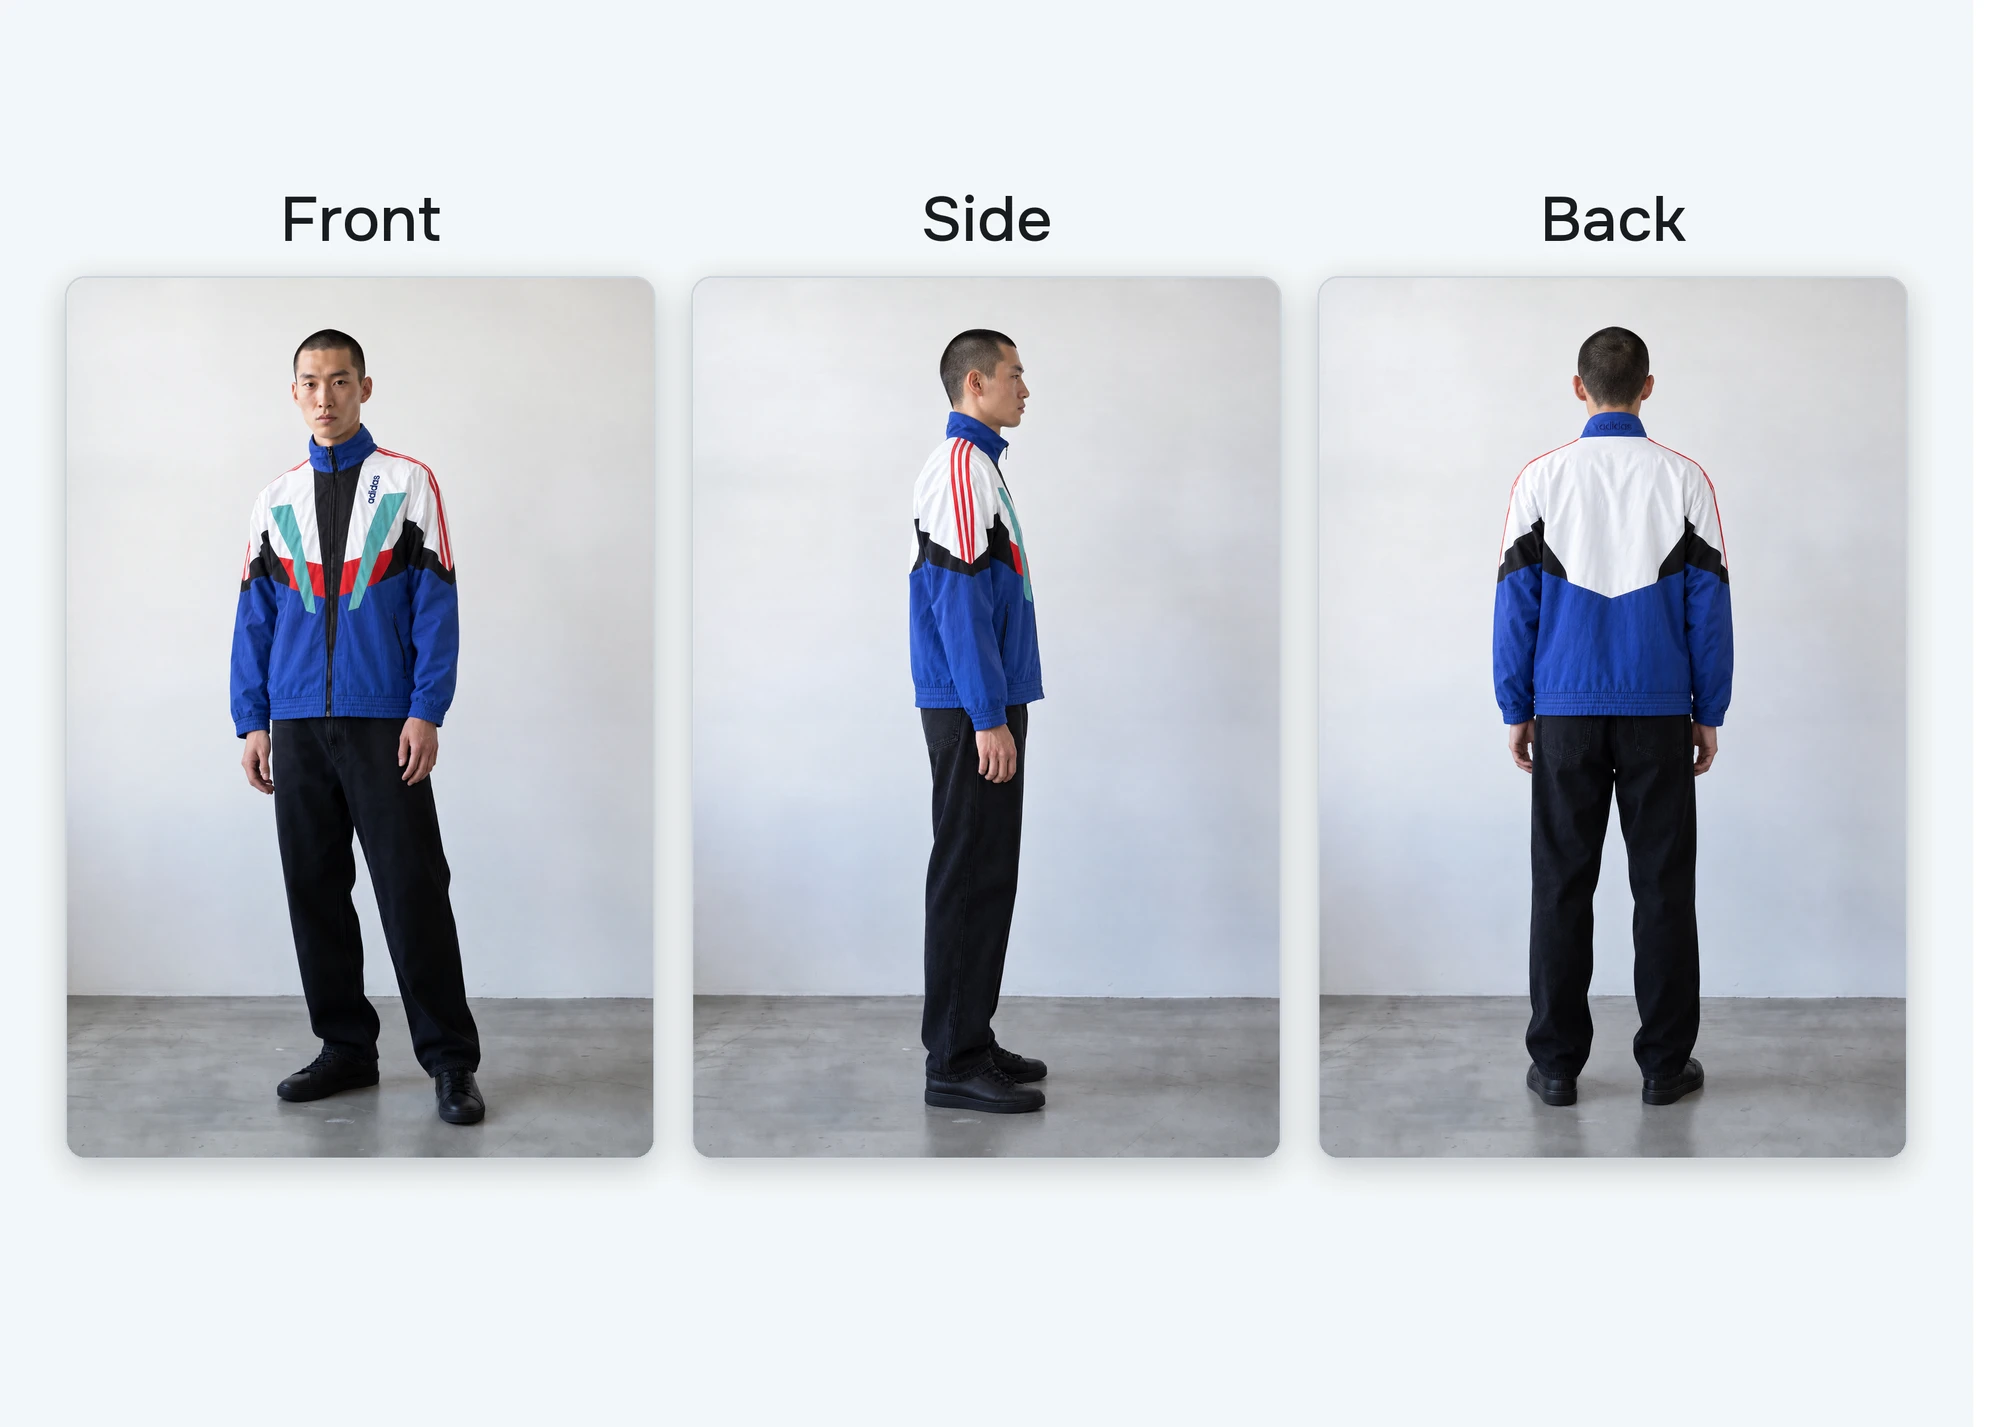
Front, side and back. Same stripes, same colors, same logo.
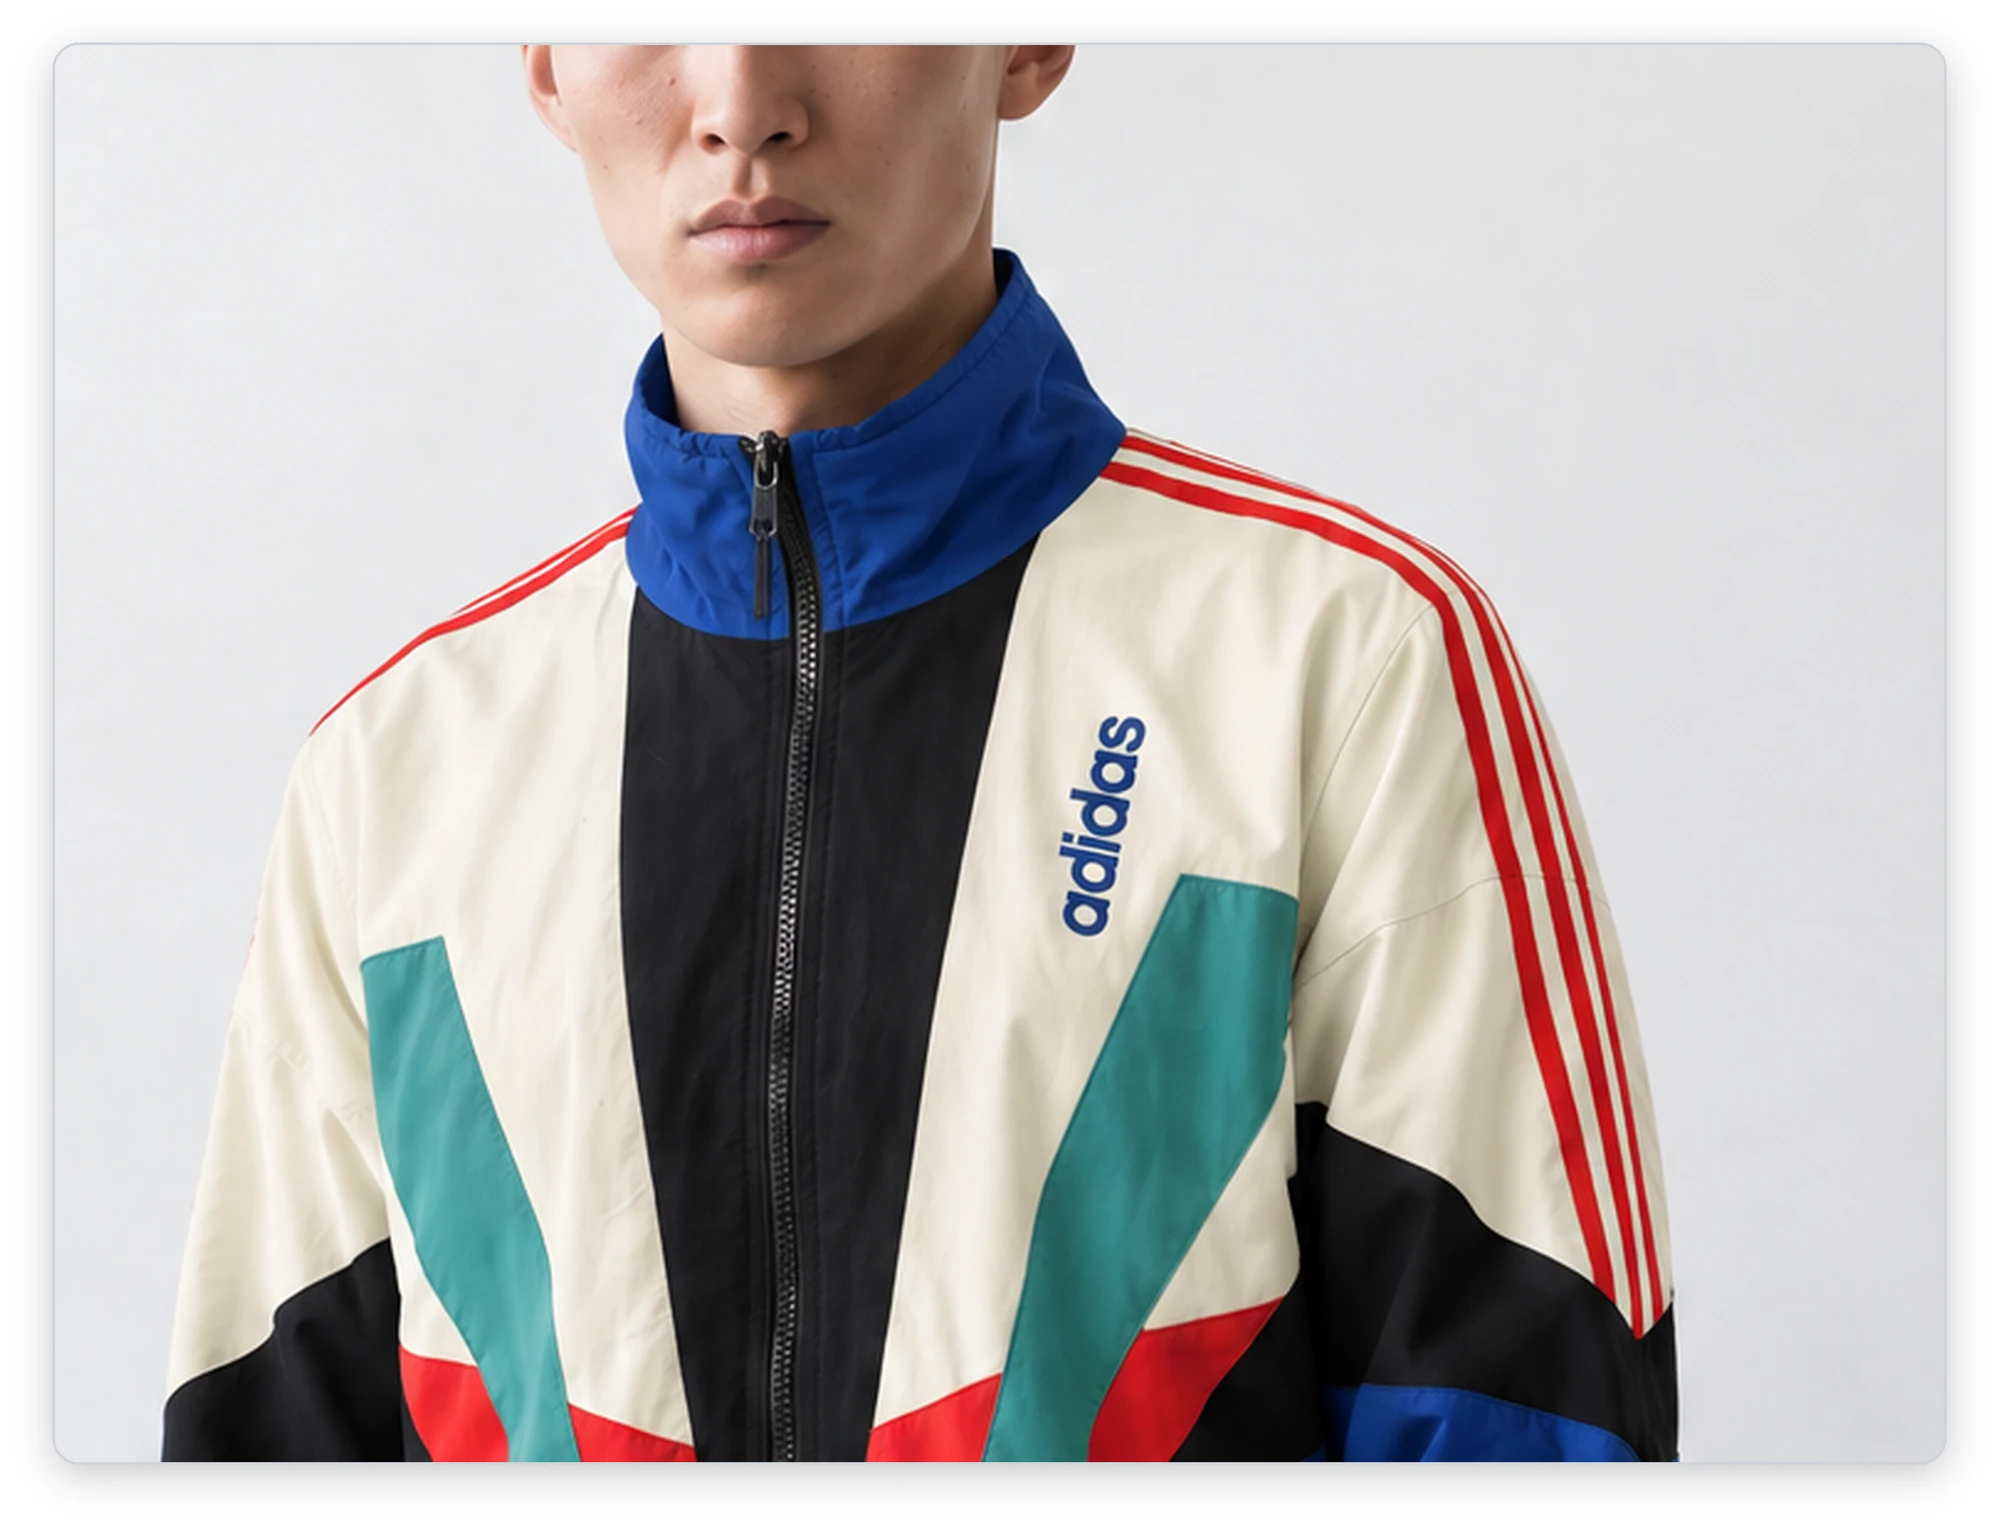
It even got the stitched word on the back of the collar, because I gave it the close up.
All of that from one message. That's what I like most about the Agent. I didn't pick a tool or write a long prompt. It looked at my six photos, figured out what each one was for and planned all three views on its own. Pretty cool, right?
What I'd Do
| Your situation | What I'd do |
|---|---|
| You have someone to wear it | Front, side and back on them. Then close ups as flat lays. |
| Just you and a mannequin | Front, side and back on the mannequin. Then close ups as flat lays. |
| No mannequin and no one to wear it | A flat lay of the front and the back, plus close ups. It works. The fit is a guess. |
| Only warm bulbs at home | Turn on the flash and point it straight at the piece. |
| A detail that has to be exactly right | Give it its own close up. |
The Short Version
Before you shoot:
- Front and back. Add a side if you can.
- On a person if you can. A mannequin if you can't. A flat lay still works.
- Neutral light or your phone's flash, pointed straight at it.
- Close ups of anything small you care about.
Try It on Your Own Clothes
Grab something from your closet and shoot it with your phone. You don't need a studio. I did all of this in my living room.
Try FASHN free. You get free credits when you sign up.
If you'd rather watch, here's the video. For the short version with every example, there's the help center guide. And if you try it, leave a comment on the video. I read every one.